DBeaver - JDBC Connection to AO Platform and Easy Answers
Intended audience: DEVELOPERS ADMINISTRATORS
AO Platform: 4.3
Overview
This topic provides insight into how to access the AO Platform Ontology and Easy Answers from the DBeaver SQL Product.
This integration should be considered a Preview in the 4.3 release. More functionality is expected to become available in future releases.
General connectivity and data flow between DBeaver and the AO Platform
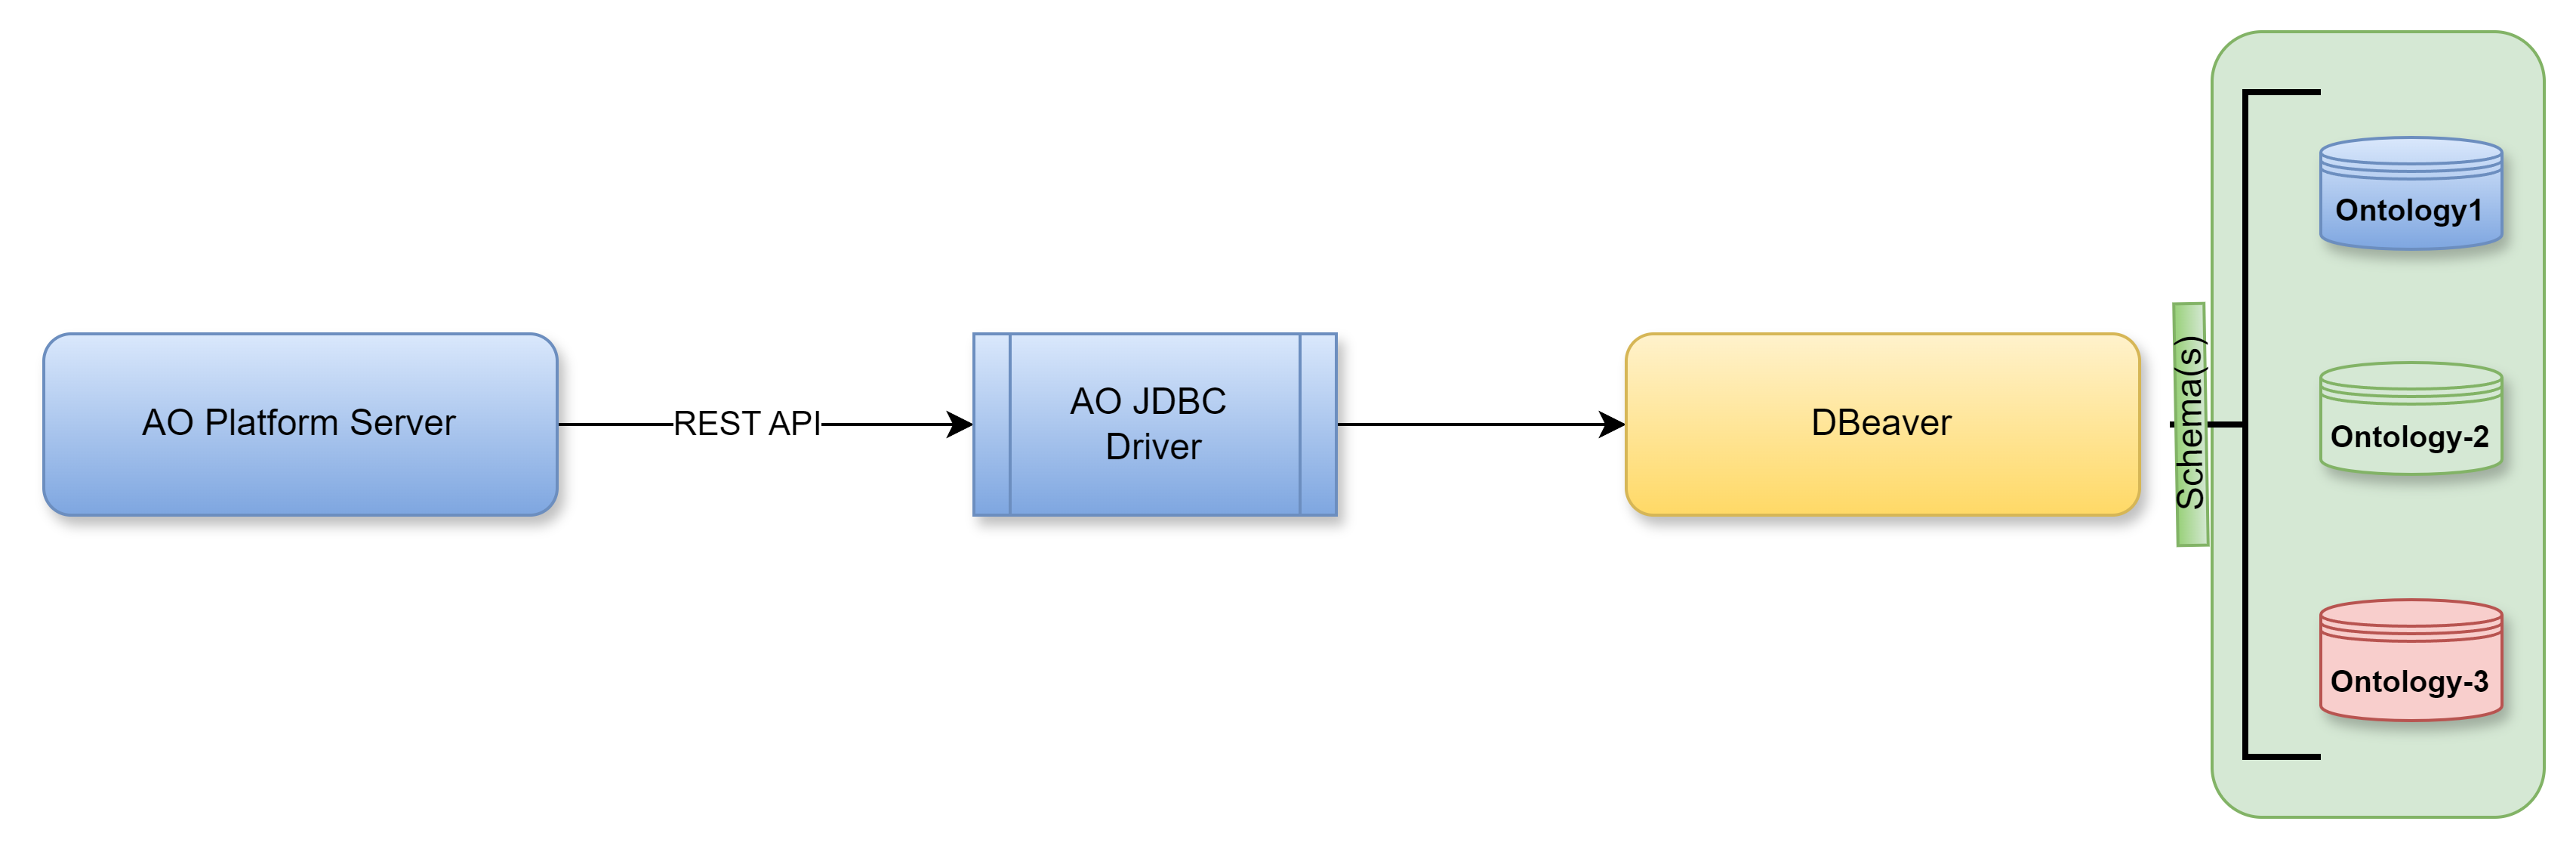
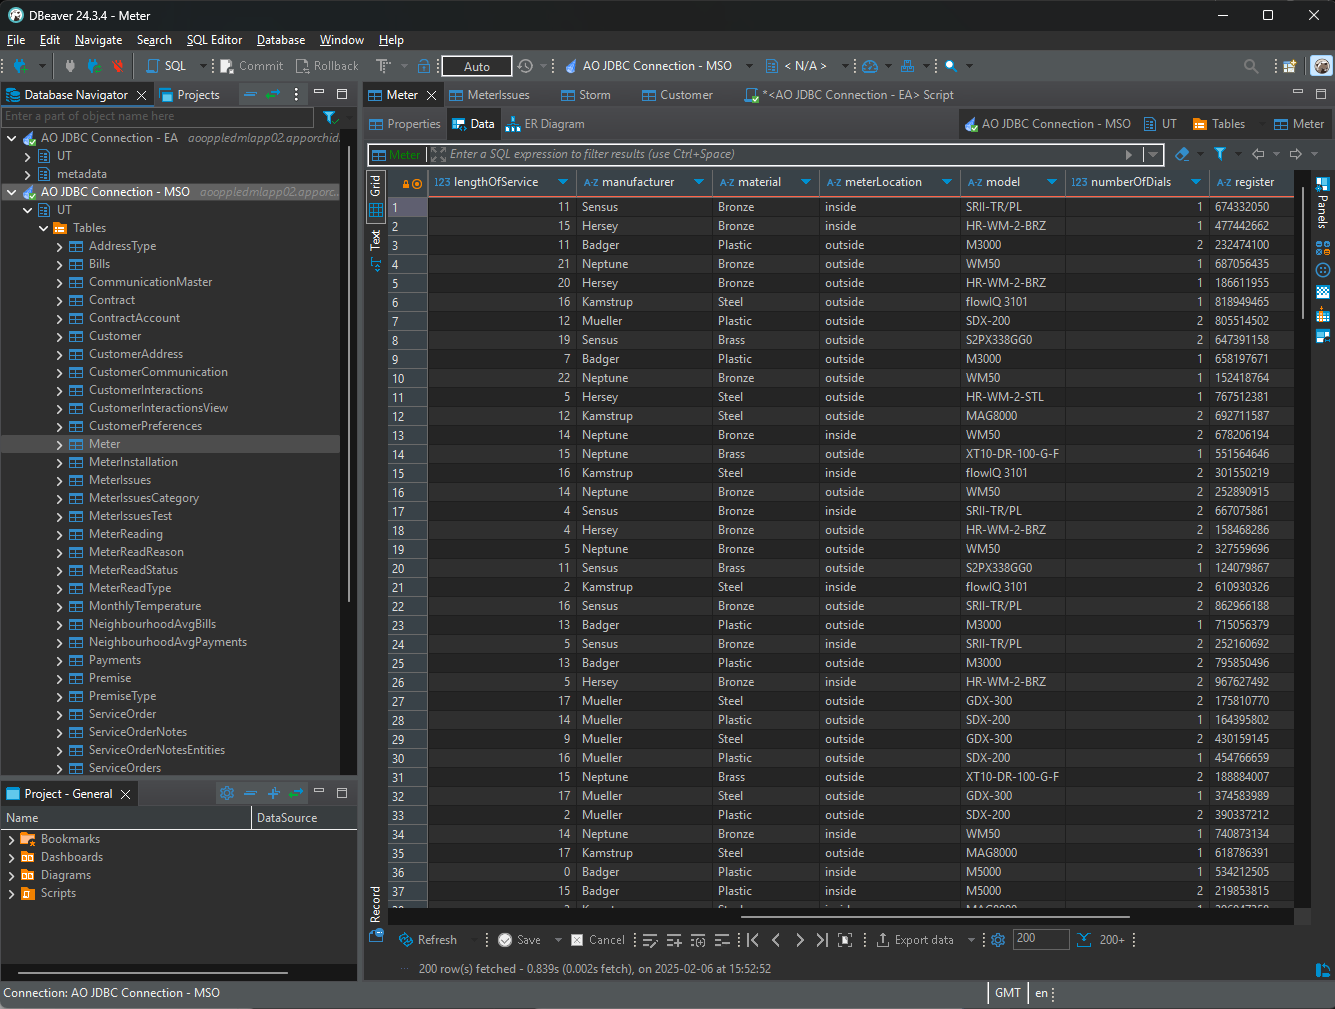
DBeaver example showing data tables from an AO Platform Ontology
Installation and Configuration
Download and install DBeaver from https://dbeaver.io/download/.
Once installed, open DBeaver.
Select File > New from the menu bar, then select Database Connection in the DBeaver folder…

…then the Apache Calcite Avatica connection.
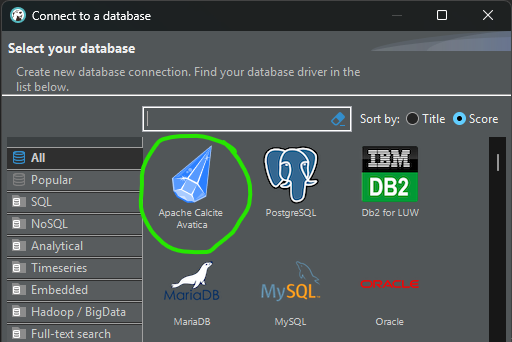
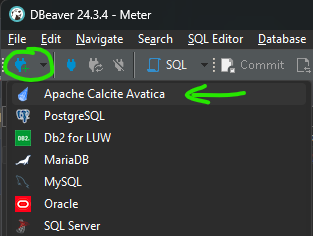
Alternatively, select the Apache Calcite Avatica connection directly from the “plug+” icon in the toolbar dropdown.
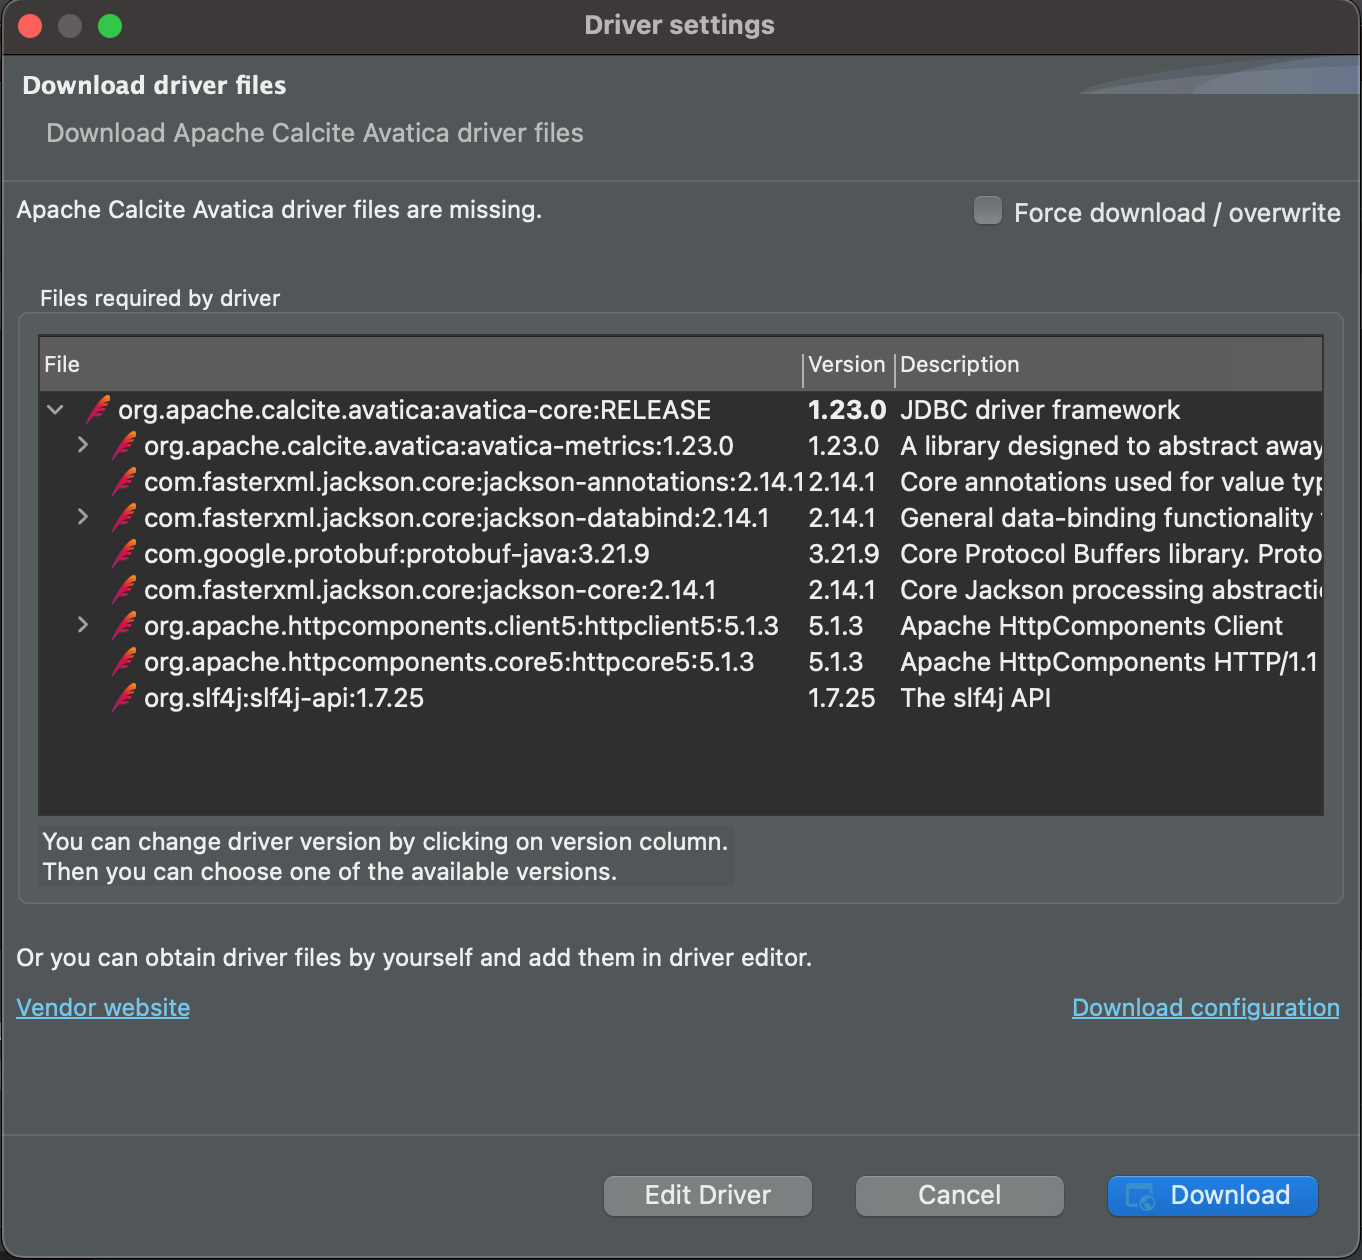
If this is the first time the Apache Calcite Avatica is selected in the DBeaver environment, a dialog will open to indicate that a download of additional files is required. Go ahead with the download before continuing!
The Connect to a database dialog opens. On the Main tab enter the following:
Host (or URL) - this is the hostname for your AO Platform connection, such as customer.apporchid.com (if hosted by App Orchid). If using the URL option, the full JDBC URL: is required, eg, jdbc:avatica:remote:url=https://customer.apporchid.com:8765
Port - this is the port number for the Calcite Server in the AO Platform that connects to the Ontology selected. Default port is: 8765
Make sure that the port number is available/open in the firewall related to the AO Platform, as otherwise the Test Connection (see below) will fail!
Username - this is the username for your account in the AO Platform. The username is often your email address.
Password - this is the password for your account in the AO Platform.
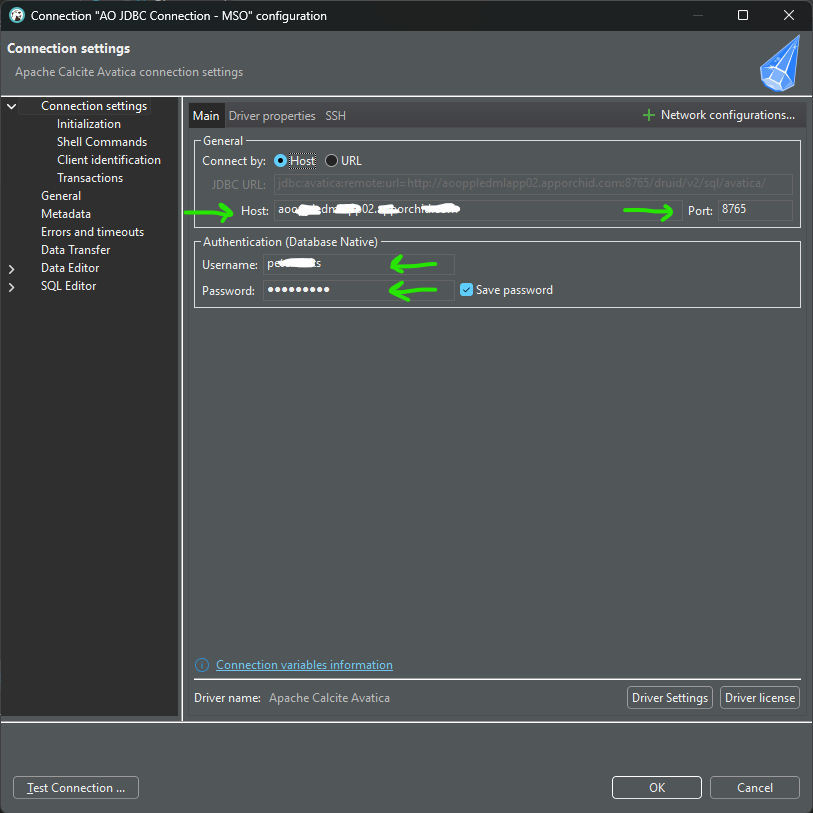
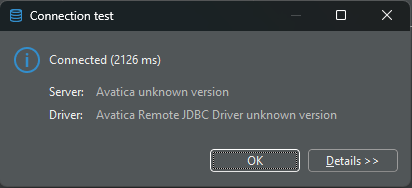
Then click the Test Connection … button. If successful, this dialog shows.
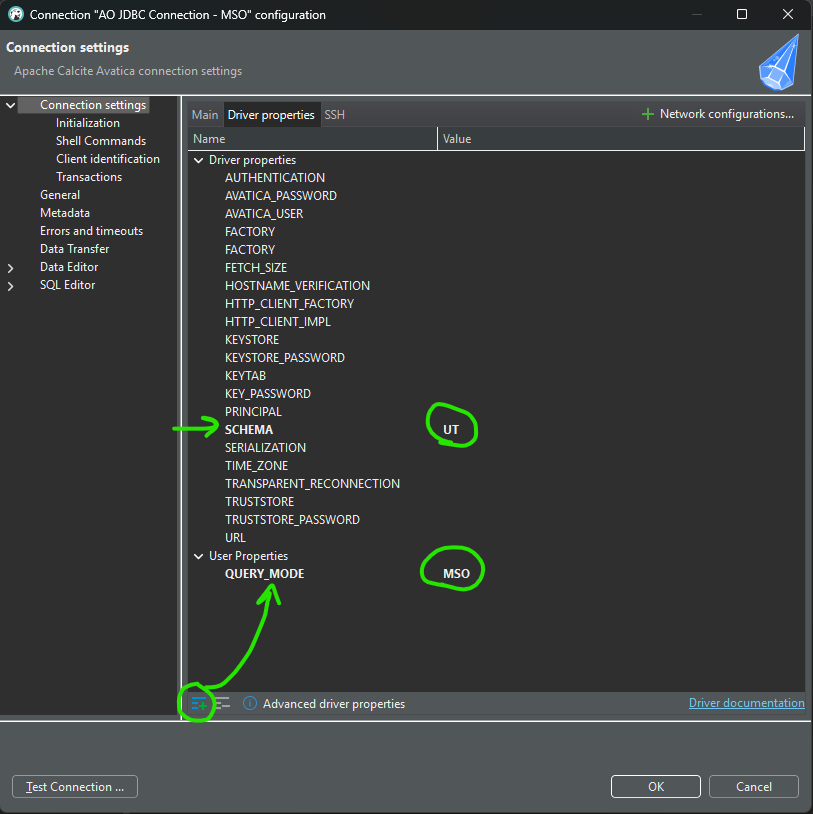
Click OK to go back to the Connection Settings dialog, then click on the Driver properties tab
Two properties are required:
SCHEMA - enter a Schema Prefix for the Ontology in the AO Platform to be connected to, eg. UT for the Utilities Ontology used by the Asset AI solution.
QUERY_MODE - add this property from this
 icon, and as a value use…
MSO - to retrieve data based on SQL queries
EA - to retrieve data based on Easy Answers Natural Language Questions (NLQs).
Installation and Configuration are now done!
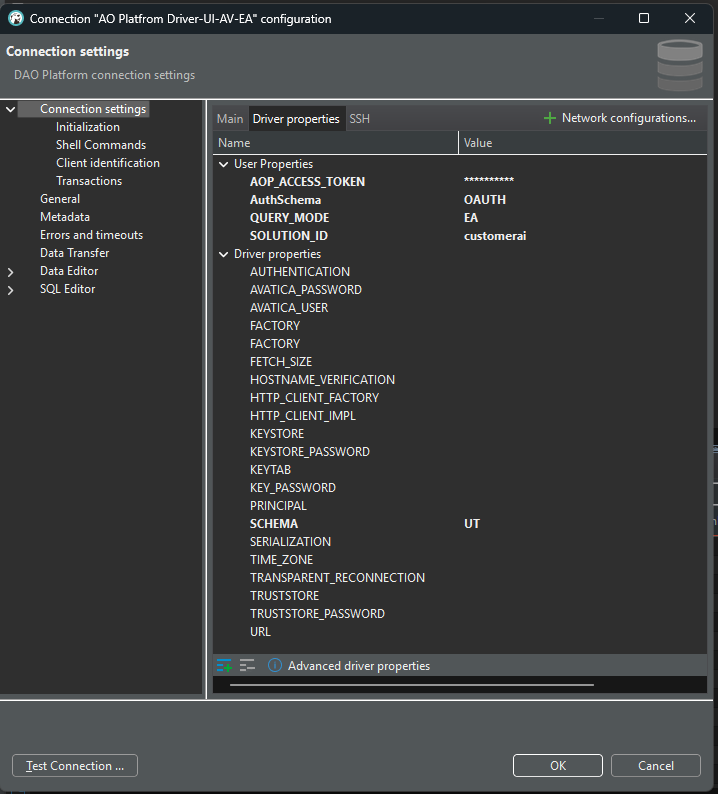
Using OAUTH Authentication Token Instead of Username/Password Credentials
First, delete the username and password from the Connection Settings > Main tab (keep the Save password checkbox checked).
Add the following User Properties on the Driver properties tab:
AuthSchema - with value OAUTH
AOP_ACCESS_TOKEN - with value <OAuth Bearer Token>, using this token format: 423224fb-d0d8-4fdf-8e40-cb28583435f3
SOLUTION_ID - with value as customerai
Use of DBeaver Connection to AO Platform
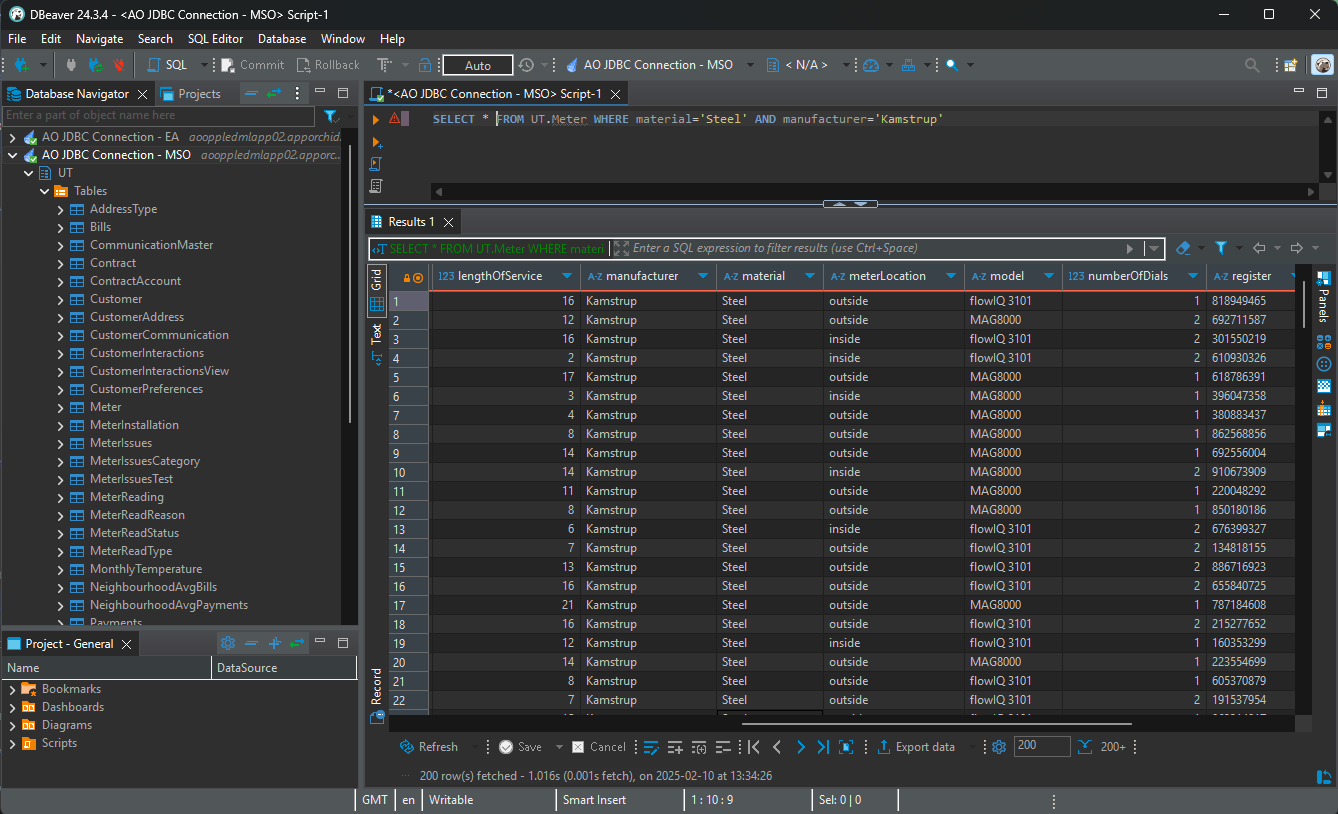
Using QUERY_MODE: MSO, - and asking a SQL query >
SELECT * FROM UT.Meter WHERE material='Steel' AND manufacturer='Kamstrup'
Using QUERY_MODE: EA, - and asking a Natural Language Question >
SHOW ALL meters
