Approving Data Annotations
Intended audience: DEVELOPERS ADMINISTRATORS
AO Platform: 4.3
Overview
The prerequisites for the Annotation approval workflow is to have at least one Annotation added by a user and for permissions to approve assigned to a user Role, such as an Administrator. If permissions to approve have not been assigned to a user Role, all Annotations will be auto-approved by default by the system.
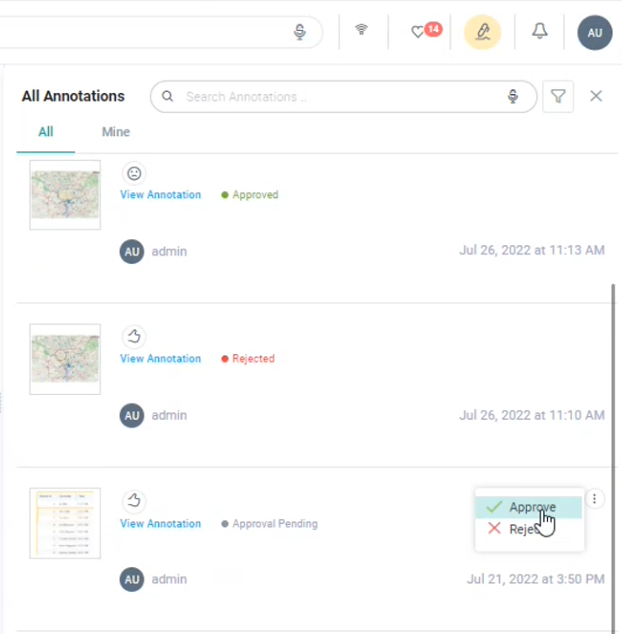
In the Annotation right-side panel - click the :annotation_icon: icon in the Solution Header where available. For each Annotation shown, click the Options menu from which the Administrator has access to either Accept or Reject the Annotation. In case of Rejection, the user has the option to provide a reason. The status will also be shown for each Annotation as either:
Approval Pending
Approved
Rejected