Creating a Solution
Intended audience: END-USERS DEVELOPERS
AO Platform: 4.3
Overview
Creating a Solution is a simple matter of clicking the Add New button in the top-right corner of the Solution Composer landing page. The New Solution dialog will open. To cancel the process, click the “X” in top/right corner when the dialog is shown.
Now, populate the dialog box for New Solution, providing the…
Solution ID - enter an internal solution name. This ID field will not be user-facing but can be referenced in code as a unique identifier for this solution.
Solution Name - enter a display Name for the solution. The display name will be used in the Solution menu and in the Header section of the solution when it’s opened.
Domain - select from the dropdown which Domain the solution should be associated with.
Solution Type - select from the dropdown which Type of solution you are configuring for. Options include Desktop or Mobile.
Ontology - select from the dropdown which Ontology your solution is designed for.
Description - provide a short Description of your Easy Answers solution.
Public - select if you want to create the new solution configuration to be Public and available to all users.
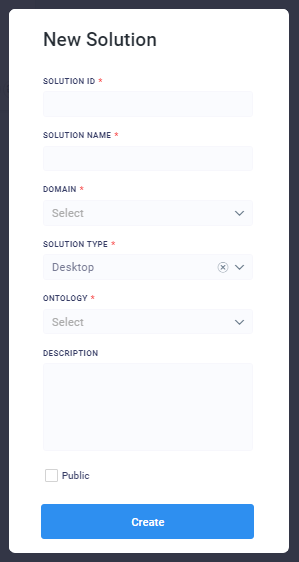
Click Create button to finish the initial Creation process. The user is now ready to edit the Solution - see Editing a Solution for details.