Step 4 - Tables (or Sheets)
Intended audience: END-USERS ANALYSTS DEVELOPERS ADMINISTRATORS
AO Platform: 4.3
Overview
Step 4 is the Tables (or Sheets) page in the Discover Ontology wizard. On this page, the user can select from one or more Tables (or Sheets in Excel data source) available in the previously selected Data Source. A dropdown option allows the user to select either specific Tables from the schema, or All Tables (specific Sheets or All Sheets if Excel data source).
If a new Data Source is required, the + Add Data Source button can be used to create a configuration for a new Data Source before Tables are selected.
To select from Tables from existing Data Source, use the + Add Tables button.

Select either…
Choose Tables - opens a Select Tables dialog where tables can either be selected from already imported tables in the cache, or more tables can be added.
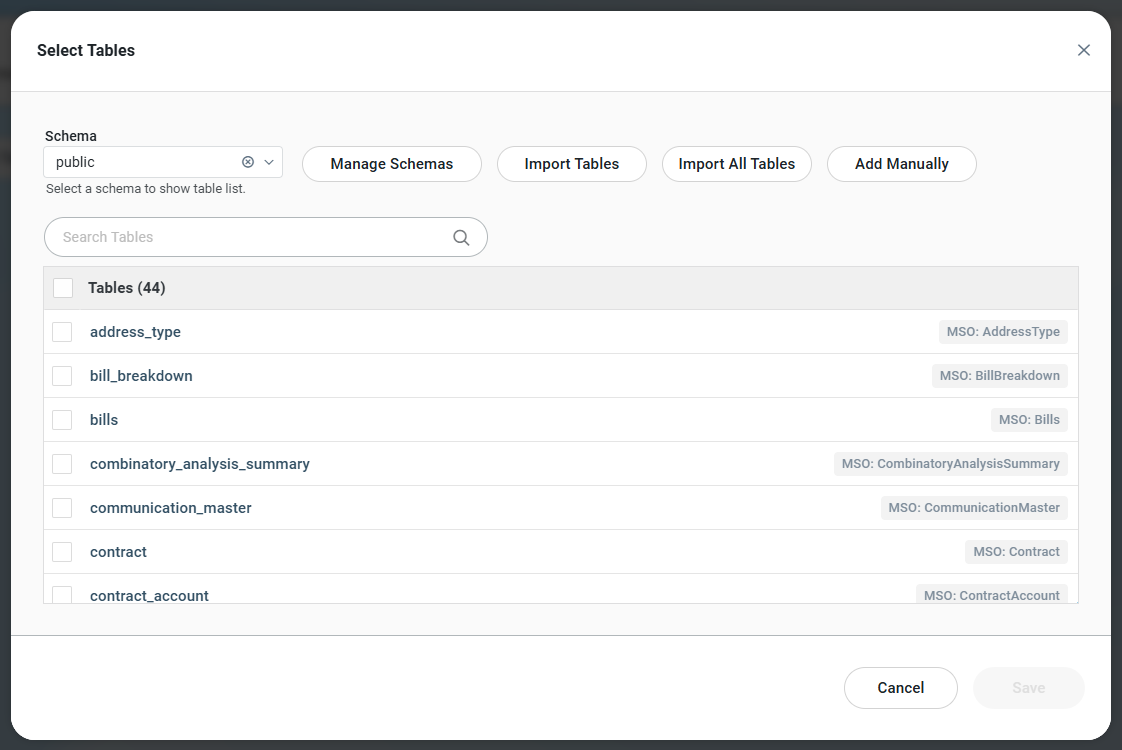
Select All Tables - this option will first request a Schema selection, then import all Tables into the Schema cache.
See also Adding Schemas and Tables to Metastore Cache for details.
Select Tables (and Fields in Tables)
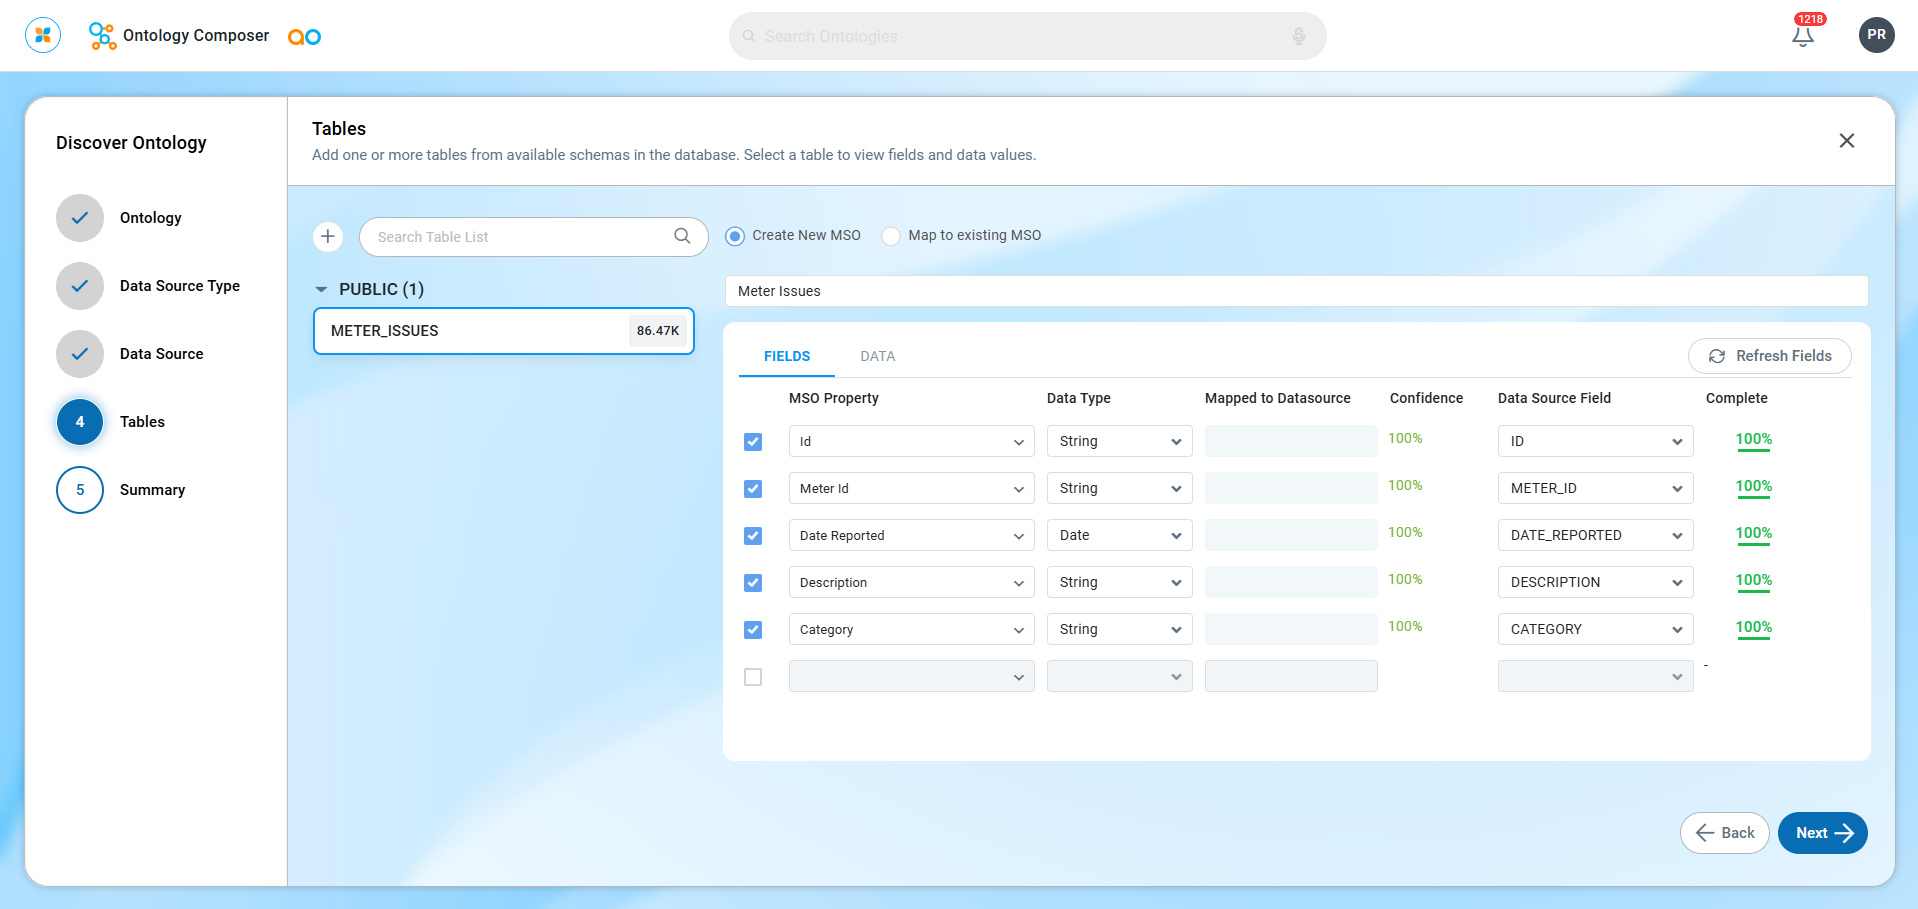
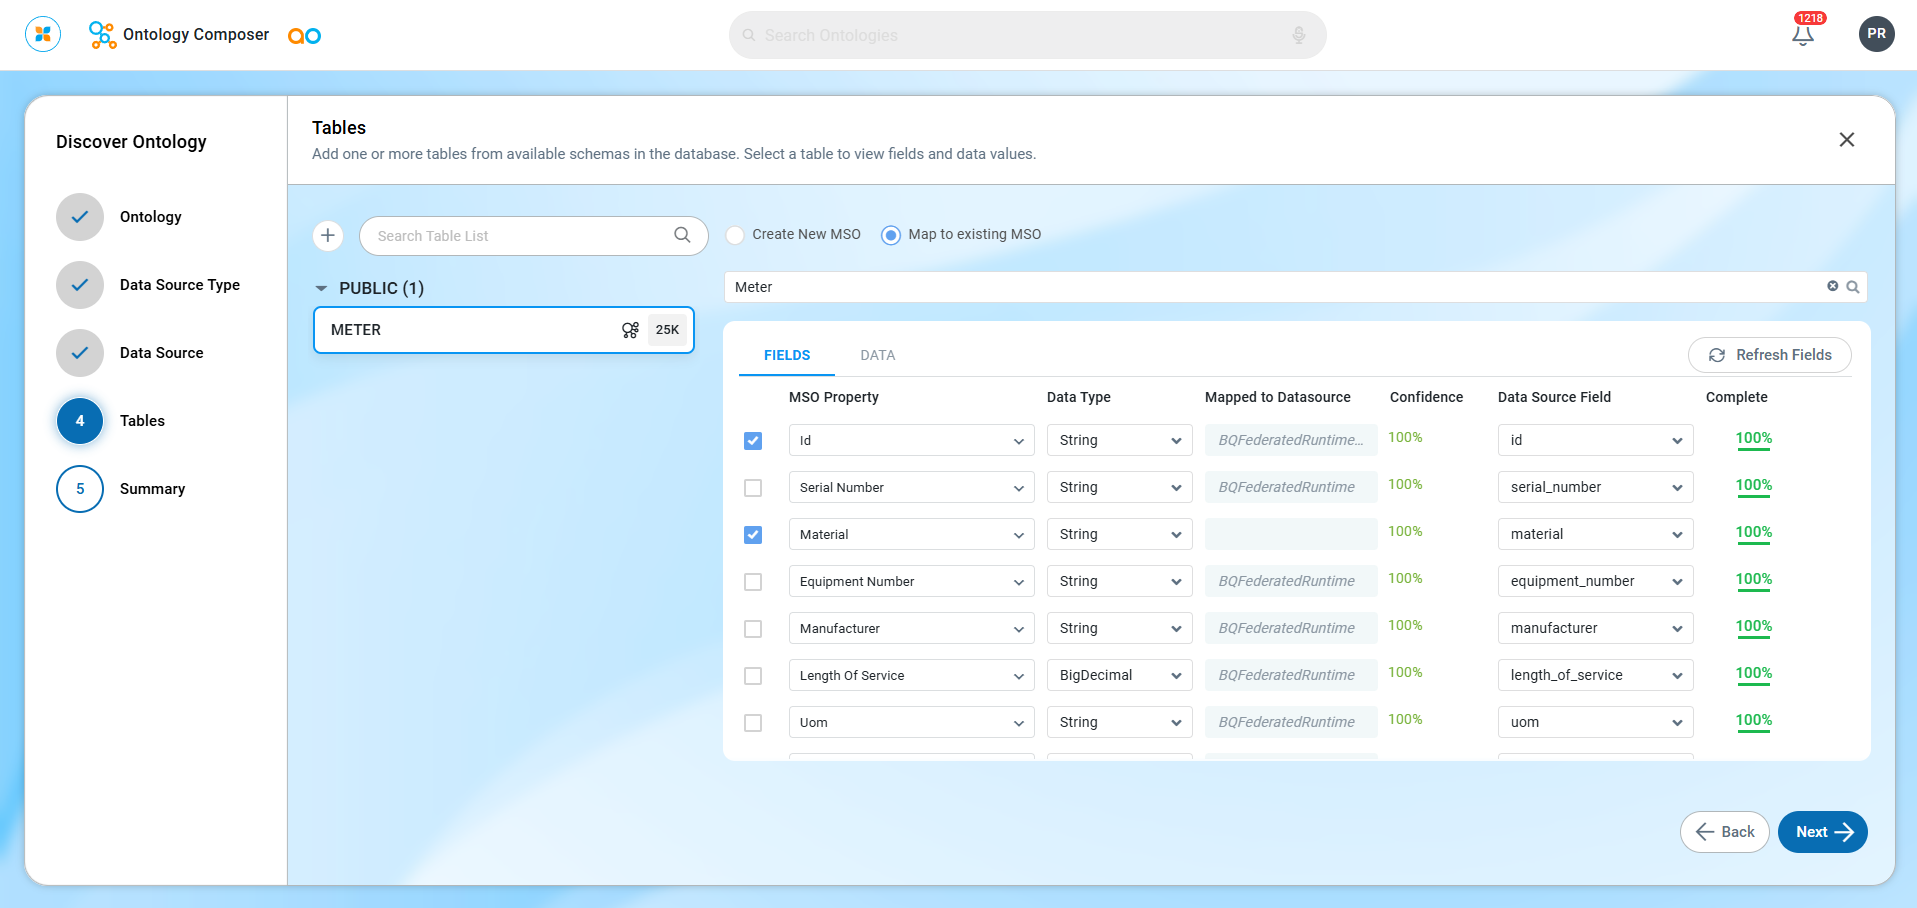
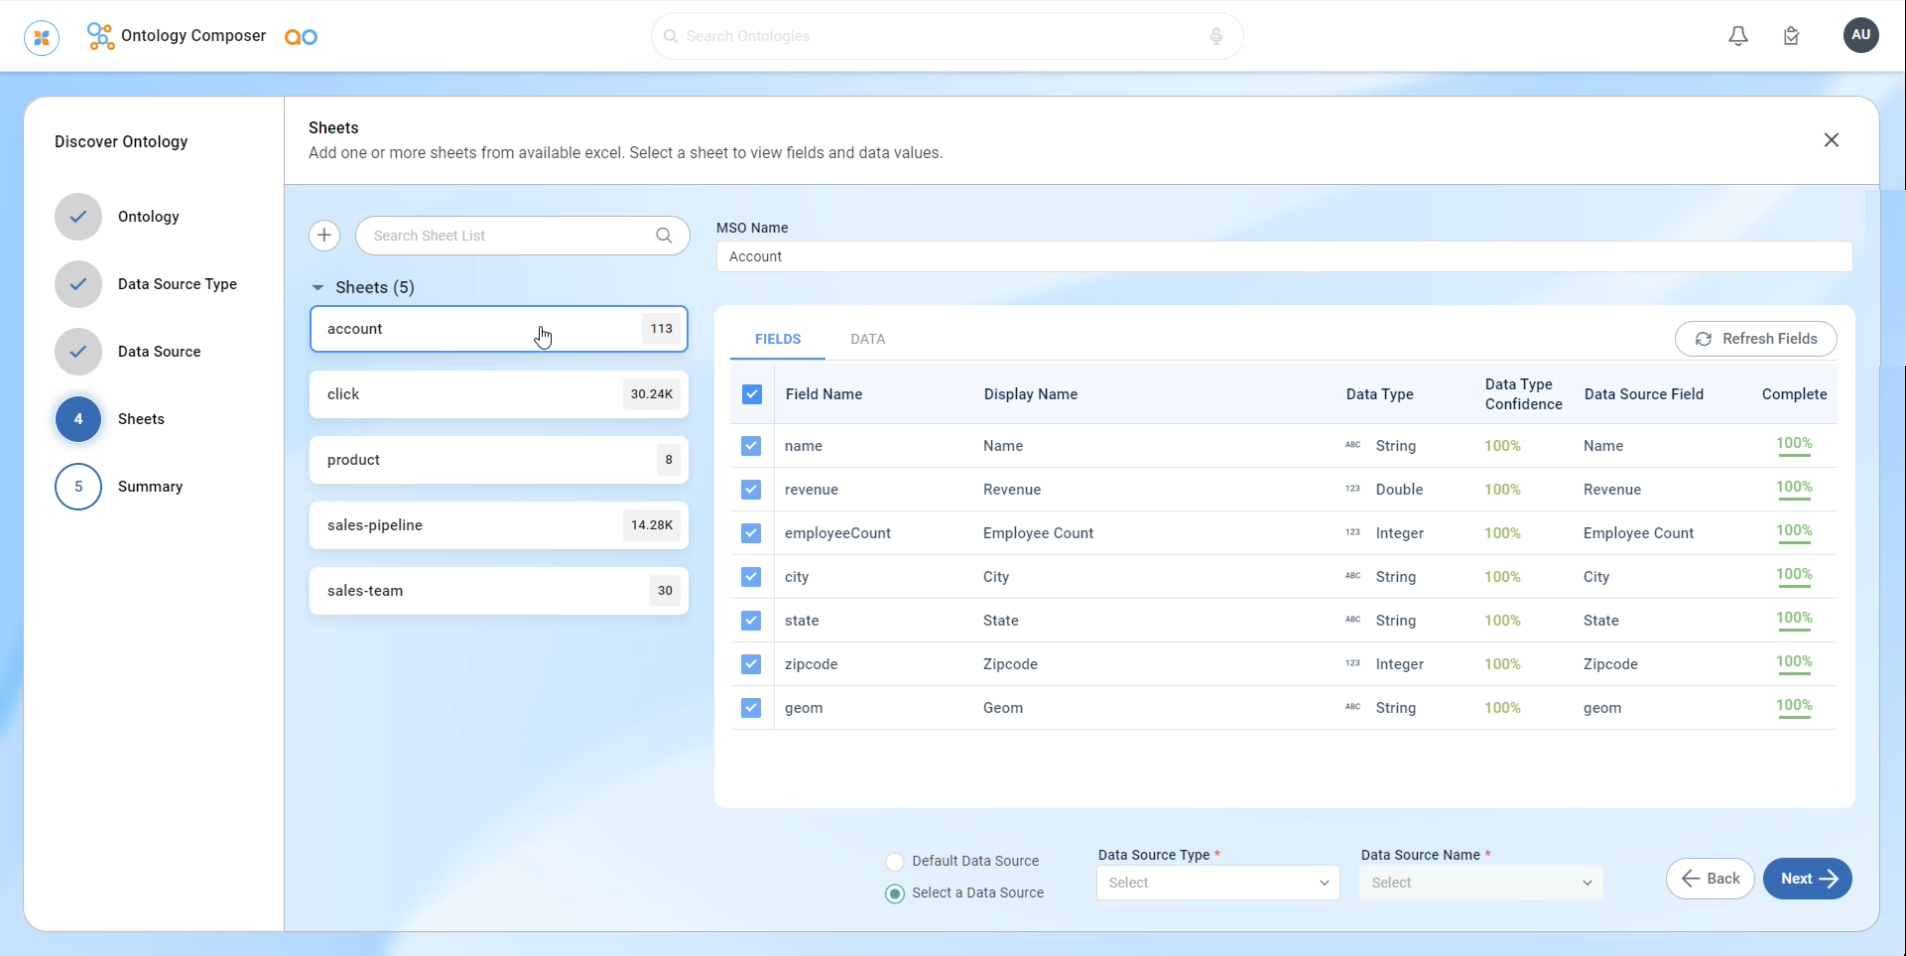
Once one or more Tables (or Sheets) have been selected, they will be shown on the left in the dialog. Each Table (or Sheet) can now be selected and the user can decide on which Fields shall be used.
Select how to create MSO from the Table selected
Create New MSO - the Table and its Fields will be used to create a new MSO. This is the default.
Map to existing MSO - if there’s already an MSO created with the same name provided by the Table, this options allows the Fields to be mapped to the existing MSO. This is particularly useful in Federated Data use cases, where an MSO can consist of data from multiple data sources. See Ontology - Federated Data.
A Display Name can be created, and the Data Type of each Field can also be updated, if necessary.
The FIELDS tab shows the mapping between the data source table fields and the MSO being created/edited, and includes the following columns:
Checkbox - select or deselect as needed. Not all data source fields will need to be added to an MSO.
MSO Property - dropdown - select the MSO Property name from the dropdown, or change the selection if the auto-populated fields are not correct.
Data Type - dropdown - select the Data Type for the MSO Property. This selection is also auto-populated, but it’s a good idea to double-check these values, as you may want to change the data type in some cases.
Mapped to Data Source - read-only text field - this field will show if a data source has already been mapped to the MSO Property. An MSO can have MSO Properties mapped from multiple data sources. This is often used in a Federated Data configuration. See Ontology - Federated Data.
Confidence percentage - read-only text field - to indicate where the discovery process may not be entirely sure of the Data Type proposed.
Data Source Field - dropdown - select which Data Source Field is to be mapped to the MSO Property.
Complete percentage - read-only text field - to indicate if the Data Source Field has values for all records.
The DATA tab will show up to 50 records from the Table to help the user understand the kind of data available.
For Excel data sources, users need to select where the Excel data will be stored. Options are:
Default Data Source - this option will store the Excel data in the default Data Source used by the AO Platform. This is typically within the PostgreSQL database.
Select a Data Source - this option will further need users to select the Data Source Type as well as the Data Source Name.
Database Tables
Create New MSO
Map to existing MSO
Excel Sheets
Click Next to go to Step 5 - Summary.