
Intended audience: users DEVELOPERS ADMINISTRATORS
AO Platform and AO Easy Answers: 5.0
Overview
The User Settings dialog in the User Menu is divided into tabs, including:
-
General
-
Profile
-
Privacy
-
Easy Answers
-
Notifications
-
API Keys
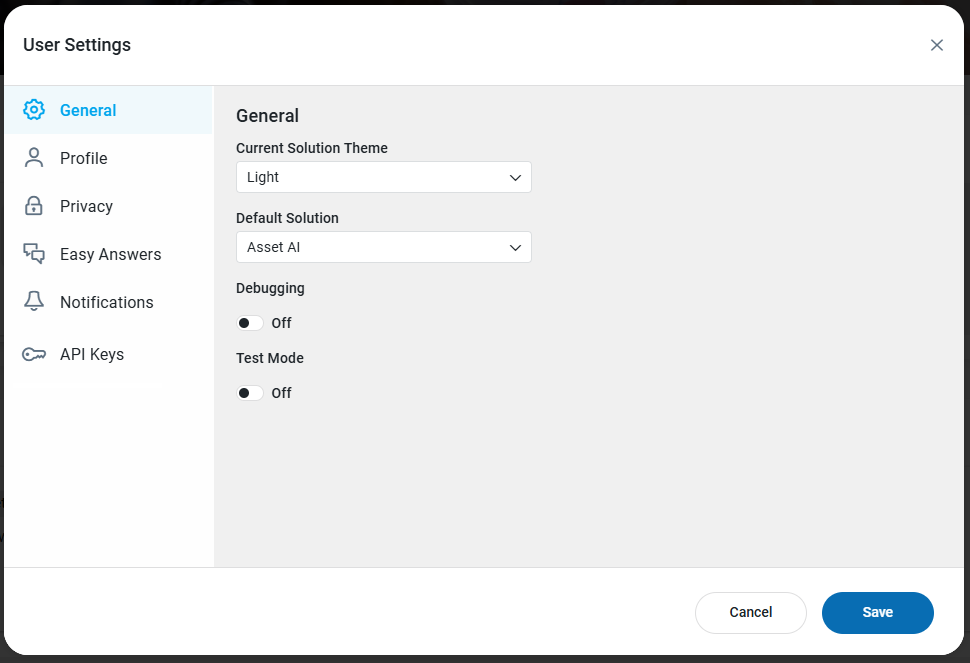
General
|
Label |
UI Widget |
Default |
Description |
|---|---|---|---|
|
Dropdown |
Light |
Users can select between different Themes for the user interface of a given Solution, including Light, Dark, High-Contrast (Dark), Purple, and, if available, some custom Themes. Some Solutions may not have Theme selection enabled, in which case this option will not be shown. A selected Theme is specific to the current Solution. See Easy Answers Themes or Samples Themes as examples. |
|
Dropdown |
Admin |
Users can select which Solution should be the default to open after signing in. |
|
ON/OFF Toggle |
OFF |
If On, additional details will be captured in the App responses, including MSO and SQL Query information, start time and end time for requests, server type, performance metrics, and other important log info. This setting is only available for Administrator Role users. |
|
ON/OFF Toggle |
OFF |
If On, testing is primarily used for capturing MSO and SQL queries, which can be used to prepare/compare against a gold dataset. This setting is only available for Administrators Role users. |
Profile
|
Label |
UI Widget |
Default |
Description |
|---|---|---|---|
|
Text Field |
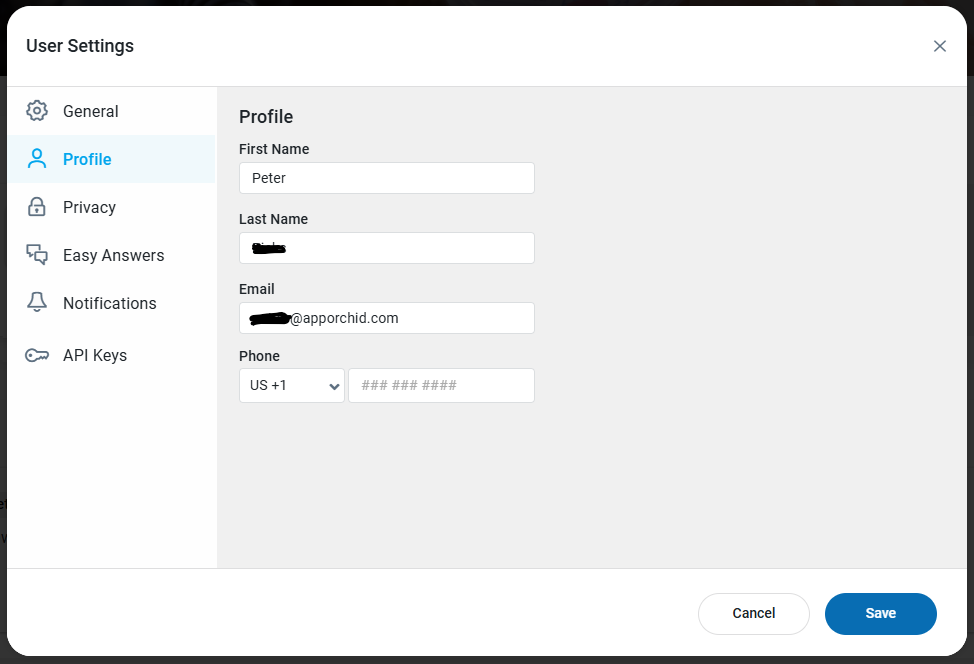
First name for the current user. |
The first name for the current user. |
|
Text Field |
Last name for the current user. |
The last name for the current user. |
|
Text Field |
Email for the current user. |
The email address for the user. This is important if user is to receive any kind of email notifications, including a password reset. |
|
Dropdown + Text Field |
Phone for the current user. |
The phone number for the user. This is important if the user is to receive any kind of SMS/text-based notifications. The phone number shall be entered, including country code, eg, +1 415 123 4567 |
Privacy
|
Label |
UI Widget |
Default |
Description |
|---|---|---|---|
|
Text Field |
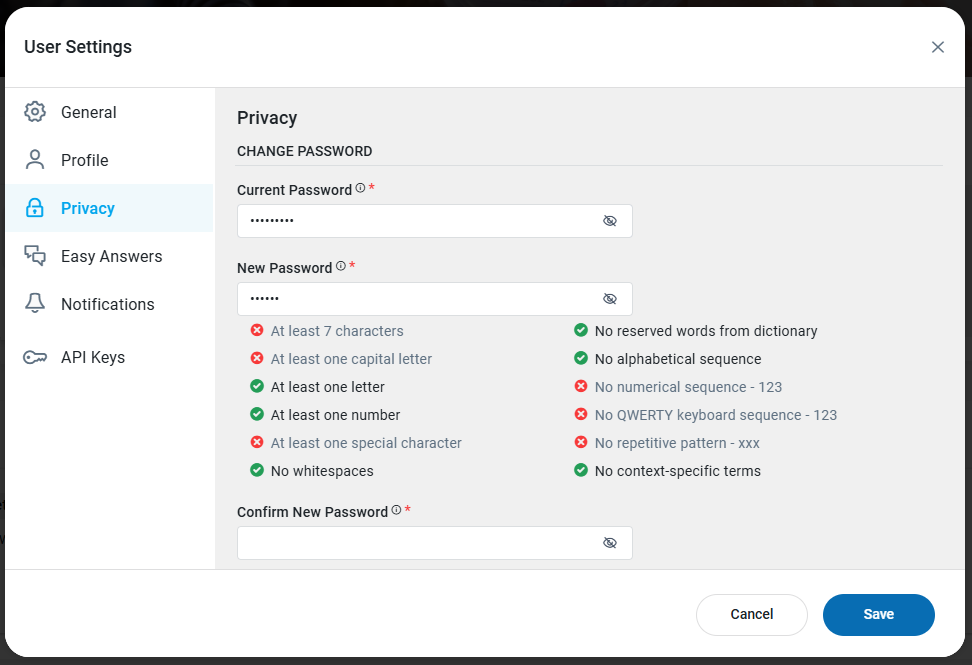
Encrypted version of the current user’s current password. |
Shows the current password for the current user. Click the eye icon to see the encrypted password as normal text. |
|
Text Field |
[Empty field] |
Allows the user to enter a new password that must adhere to the password rules stated below the field. Validation will be done when the user clicks away from the New Password field. Click the eye icon to see the encrypted password as normal text. Also, the current password must be entered in order to change to a new password. The default rules are as follows:
|
|
Text Field |
[Empty field] |
Enter the new password again to ensure that the new password has been entered correctly. Click the eye icon to see the encrypted password as normal text. |
If the user forgets their current password and cannot sign in, then contact the AO Platform Administrator to ask for a password reset.
Easy Answers
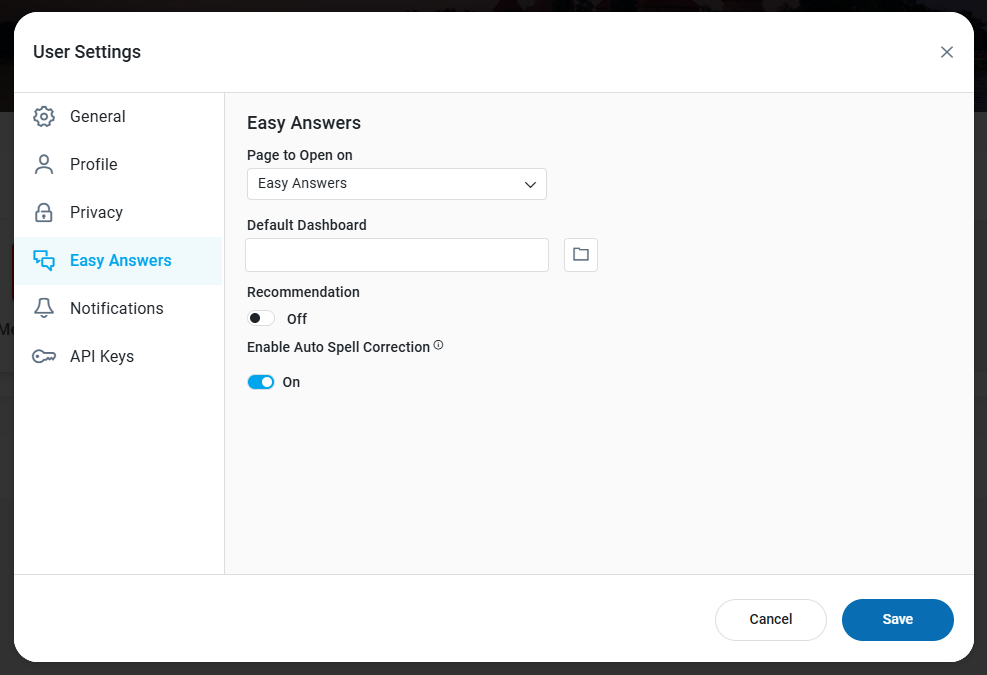
The Easy Answers tab will only be shown if the current Solution is enabled with Easy Answers functionality.
|
Label |
UI Widget |
Default |
Description |
|---|---|---|---|
|
Dropdown |
Easy Answers |
Select which page to open when the Easy Answers solution is opened. Dropdown with the following options:
|
|
Text Field w/Dashboard selection |
<user selected> |
Select which Dashboard will be selected as the default to open when the Dashboard page is shown. |
|
ON/OFF Toggle |
OFF |
If On, the Dashboard Apps on the Easy Answers screen will be ordered according to role-based recommendations (up-/down-voting of the Apps). Easy Answers makes use of user recommendations to adjust the order in which Apps are displayed on the Easy Answers Results page. Based on user sentiments (thumbs up/down) for each App, Apps will be moved up or down the page of the Results dashboard. Recommendations are only active for users belonging to the same Role(s) and only if enabled here. |
|
ON/OFF Toggle |
ON |
If enabled, when entering natural language questions (NLQs) in Easy Answers, an automatic spell-check correction will be performed. If disabled, Auto Correction will not be performed.
|
Notifications
The Notifications tab allows the user to determine whether or not to show Desktop Notifications, - or selectively suppress some types of Desktop Notifications if Desktop Notifications are enabled.
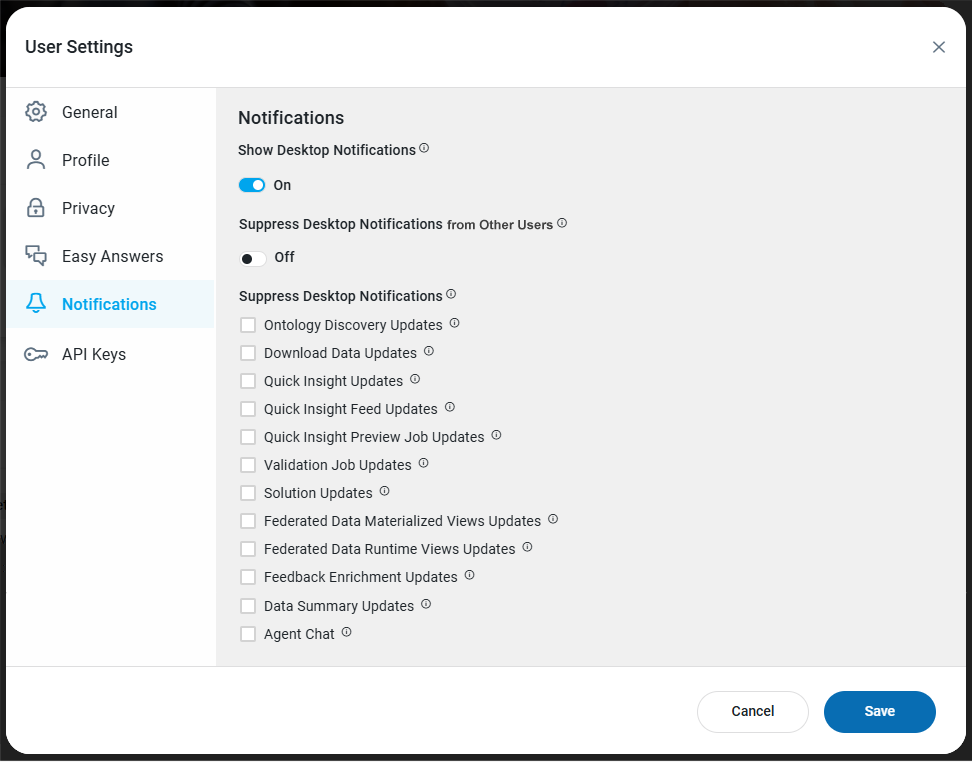
|
Label |
UI Widget |
Default |
Description |
|---|---|---|---|
|
ON/OFF Toggle |
ON |
If enabled, Desktop Notifications will be displayed. If disabled, they will be suppressed, and Notifications will exclusively appear in the Bell Icon panel from the Header. |
|
ON/OFF Toggle |
OFF |
If enabled, Desktop Notifications, caused by other users of the same Role as current user, will be suppressed for current user. |
|
Checkboxes |
No Notification Types are suppressed by default
|
Allows the user to check the checkboxes from the list of Notification types below:
|
API Keys
The API Keys tab allows users to create and manage personal API Keys. API Keys are used to authenticate access to the AO Platform's Semantic Layer from third-party tools and products, such as MCP-compatible AI tools and coding environments.
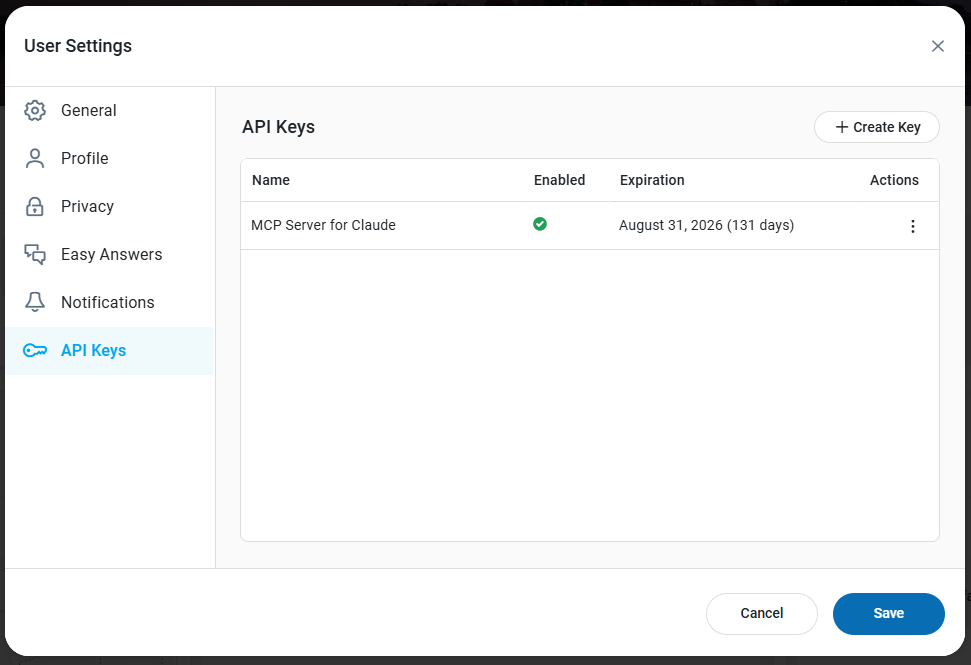
Creating New API Keys
-
Select API Keys from the User Settings dialog.
-
Click the + Create Key button. The Create API Key dialog opens.
-
Complete the following fields:
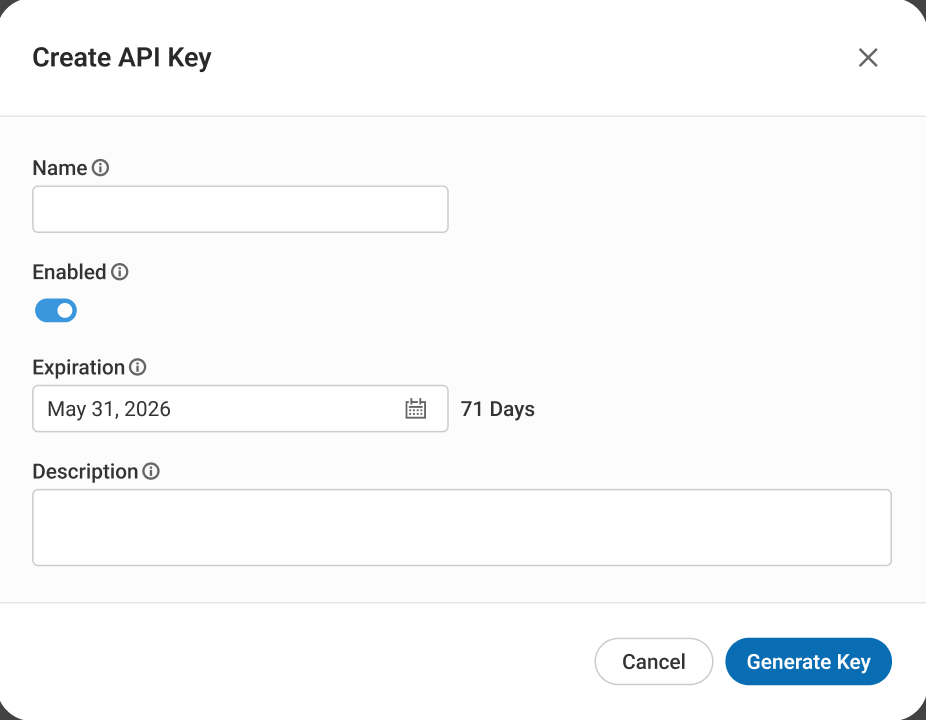
|
Label |
UI Widget |
Description |
|---|---|---|
|
Text Field |
Enter a meaningful display name as a reference for the API Key. |
|
ON/OFF Toggle |
Determines whether the API Key is active. Default is ON. |
|
Date Field |
Enter the expiration date for the API Key. The maximum number of days allowed is configured by the administrator. |
|
Multi-line Text Field |
Enter a description for the API Key and specify which product or tool it will be used with. |
-
Click Generate Key. The Copy API Key dialog opens, displaying the generated API Key.
Important: Copy the API Key before closing this dialog by clicking the Copy to Clipboard icon. This is the only time the API Key will be visible. Once the dialog is closed, the API Key cannot be retrieved. If the API Key is lost, a new API Key must be created.
Managing API Keys
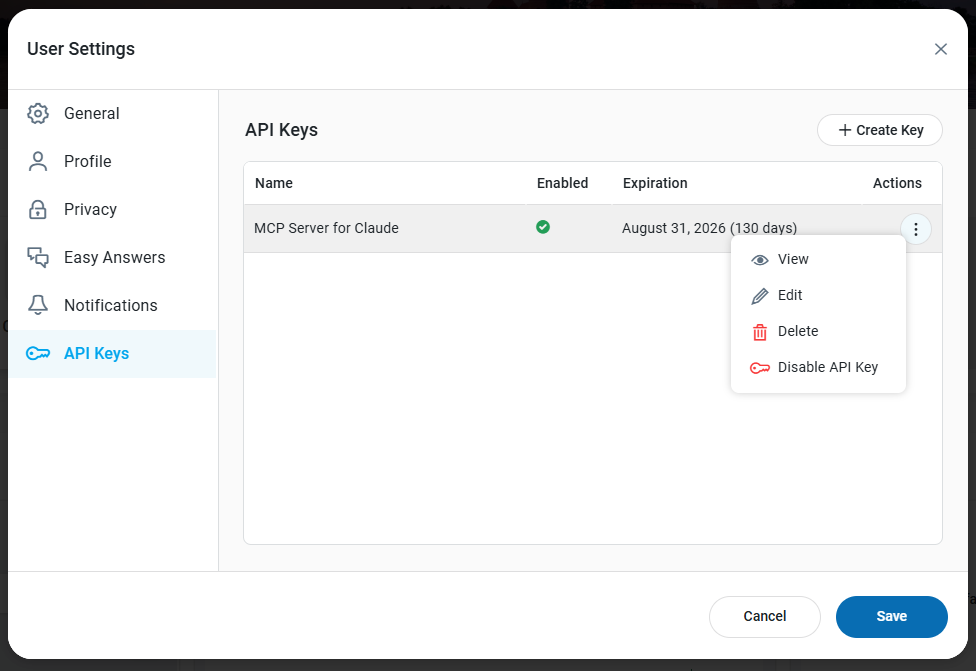
To manage existing API Keys, click the options menu for any API Key in the list. The following actions are available:
|
Action |
Description |
|---|---|
|
Opens the API Key details in read-only mode. |
|
Opens the API Key for editing. Name, Enabled status, Expiration date, and Description can be updated. |
|
Permanently deletes the API Key. A confirmation dialog requires the user to type DELETE before the key is removed. |
|
Toggles the API Key between active and inactive states. A confirmation dialog is shown before the change is applied. |
-
The maximum number of API Keys a user can create and the maximum expiration period are configured by the administrator.
-
API Keys created in the User Settings dialog are specific to the current user and cannot be used by other users.
Contact App Orchid | Disclaimer