Creating a Scheduled Insight Task
Intended audience: END-USERS DEVELOPERS
AO Platform: 4.2
Overview
The New Scheduled Task dialog appears when the user clicks the + Add New button on the Scheduler page. The process varies a little depending on the Insight Type being scheduled.
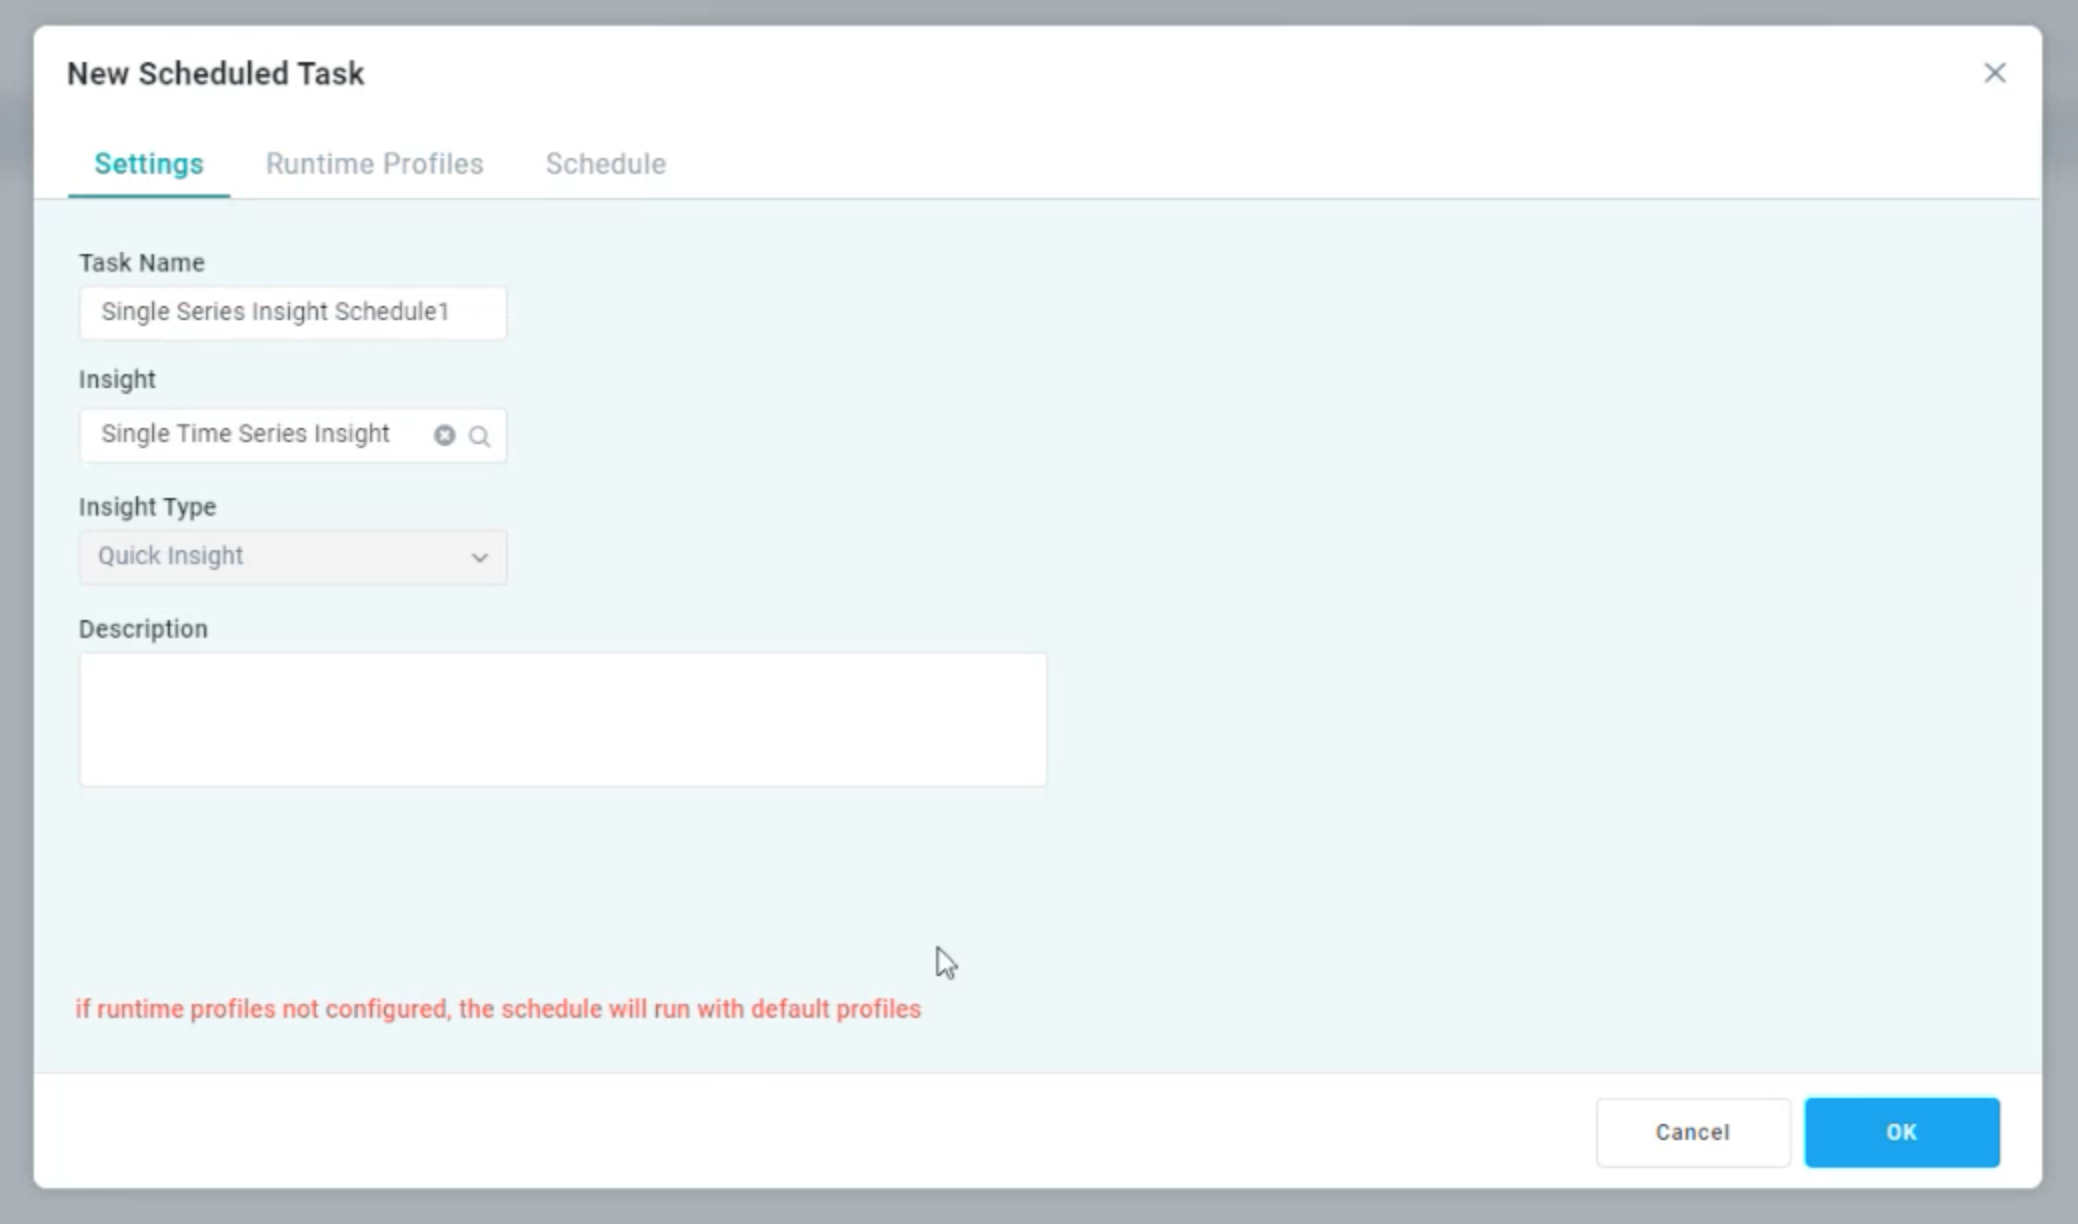
Settings tab
On the Settings tab, the basic information, such as a Task Name and a Description shall be provided. Select which Insight to create a Schedule for. The Insight Type will be shown as read-only information.
Once the Settings properties are configured, move on to select the Runtime Profiles (for Quick Insight type only), or create the Schedule.
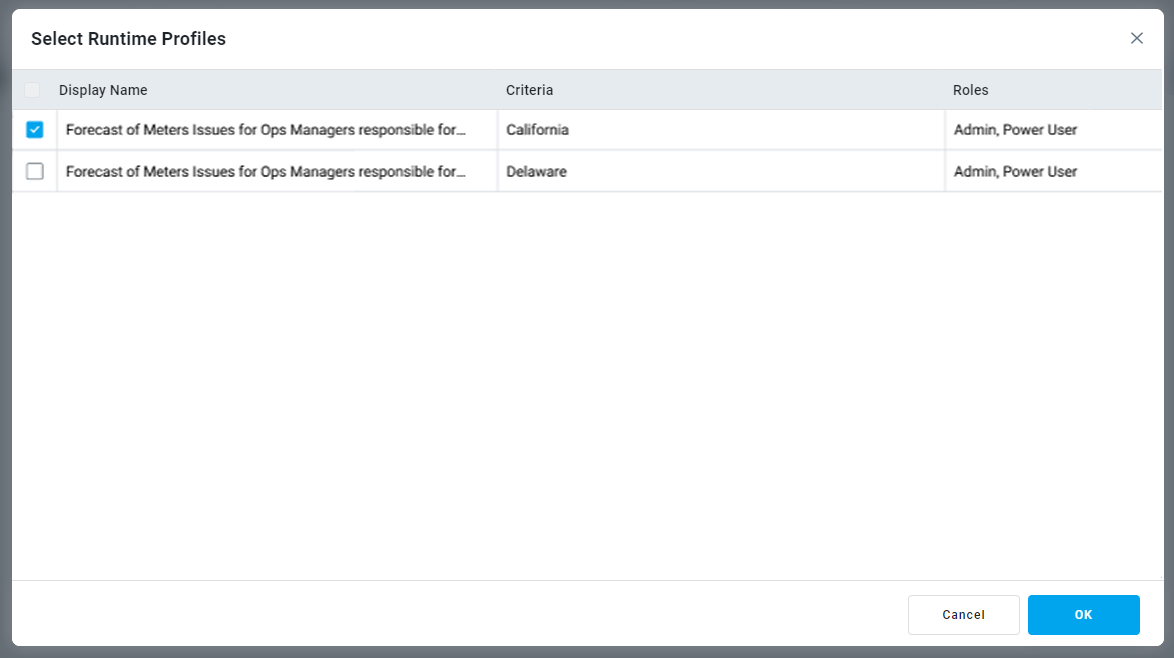
Runtime Profiles tab
The Runtime Profiles tab is only applicable for Quick Insights. It allows the user to select from the created Runtime Profiles for each Quick Insight. A Runtime Profile determines which Quick Insights will be generated based on a Criteria configuration and Recipient Roles of users.
Criteria - applying one or more Filters to the data.
Roles - determining which users will be able to view the Quick Insights once generated - based on which Roles they are associated with.
Select one or more Runtime Profiles is not mandatory. If no Runtime Profiles are configured, the default profile for the Model will be used, ie with no Criteria or specific user Roles configured.
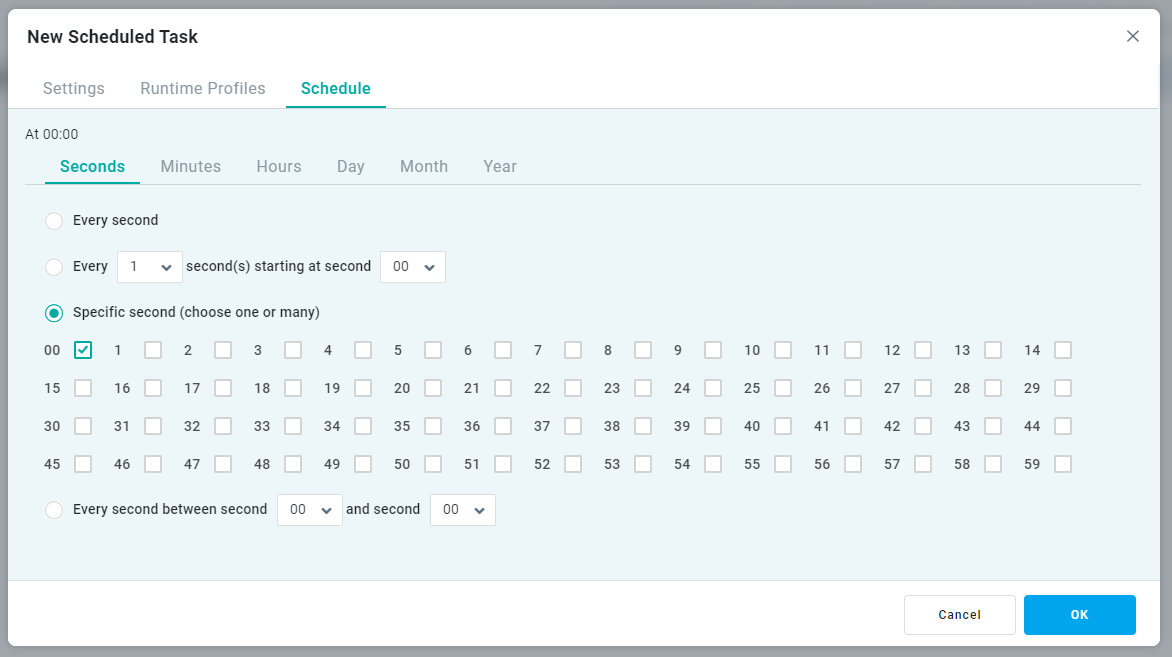
Schedule tab
The Schedule tab allows very granular scheduling to be configured for the Generated Insight Task. The outcome is a Cron Task that will run in the background on the recurring schedule configured.
The scheduled Insight will be shown with all other scheduled Insights on the main Insights - Scheduler, as well as on the specific Quick Insights > Schedule page.
The generated Insights will be shown to the users on the Insights page in the Easy Answers solution. See Easy Answers - Insights Page.