Insights - Scheduler
Intended audience: END-USERS DEVELOPERS
AO Platform: 4.2
Overview
The Scheduler page allows all configured Insights to be configured as jobs to run on a recurring schedule. This is particularly convenient for spreading the load from generating Quick Insights on the AO Platform server to off-peak hours instead of having individual users create ad-hoc Insights during a work day. This will also allow all Insights to be consistently ready for discovery without user involvement, providing a more consistent user experience.
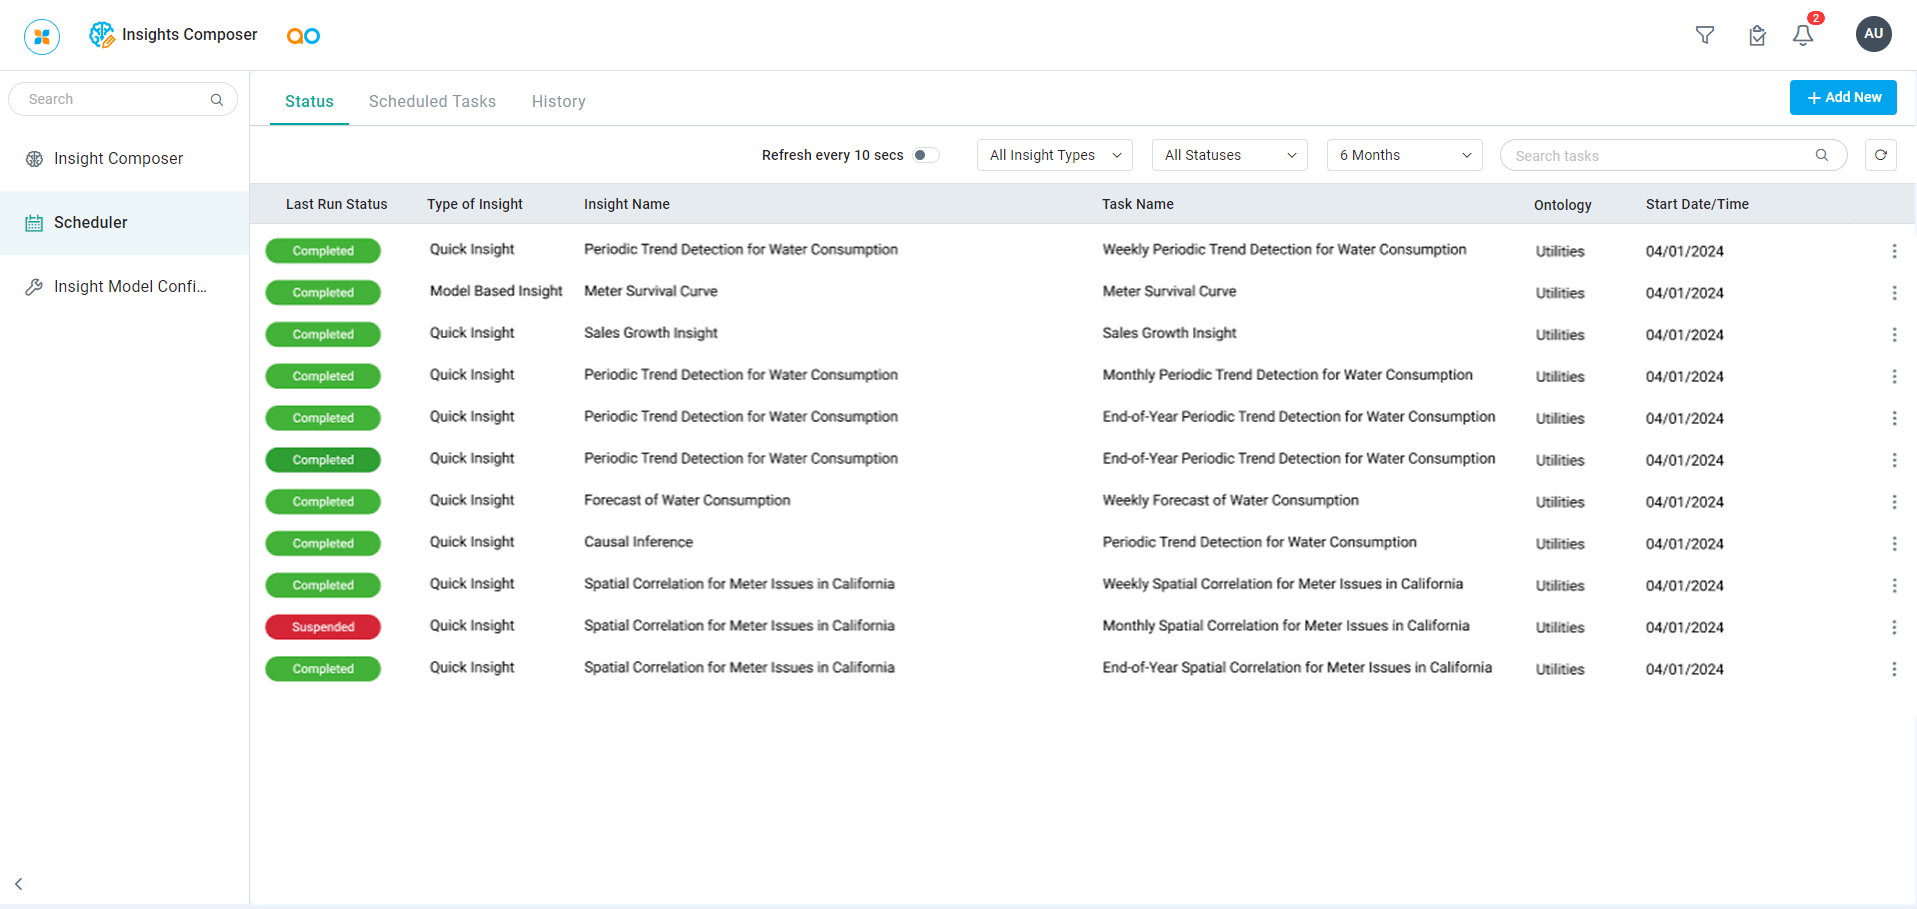
Status tab
This tab shows a listing of the most recently executed tasks for Scheduled tasks.
User Actions
On Page
Add New - click Add New button to create a new object on the current page. See Creating a Scheduled Insight Task.
Refresh every [10] secs - toggle to enable auto-refresh of the page every [10] second.
Filters
Insight Type - select to filter by Insight Type (All Insight Types, Model-based, Quick Insight, Custom).
Status - select to filter by Status (All Statuses, In Progress, Completed, Failed, Suspended, Canceled).
Time Period - select to filter by Time Period (6 Months, 3 Months, Last Month, Current Month, 2 Weeks, Last Week, Current Week).
Search - enter a Search term to find relevant objects on the selected page.
Refresh - click to refresh the page.
In the Options menu for Individual Status Entries
Open - click to open a read-only view of all property configurations for the selected Insight Model Configuration.
History - opens a dialog to show past executed tasks for this specific entry.
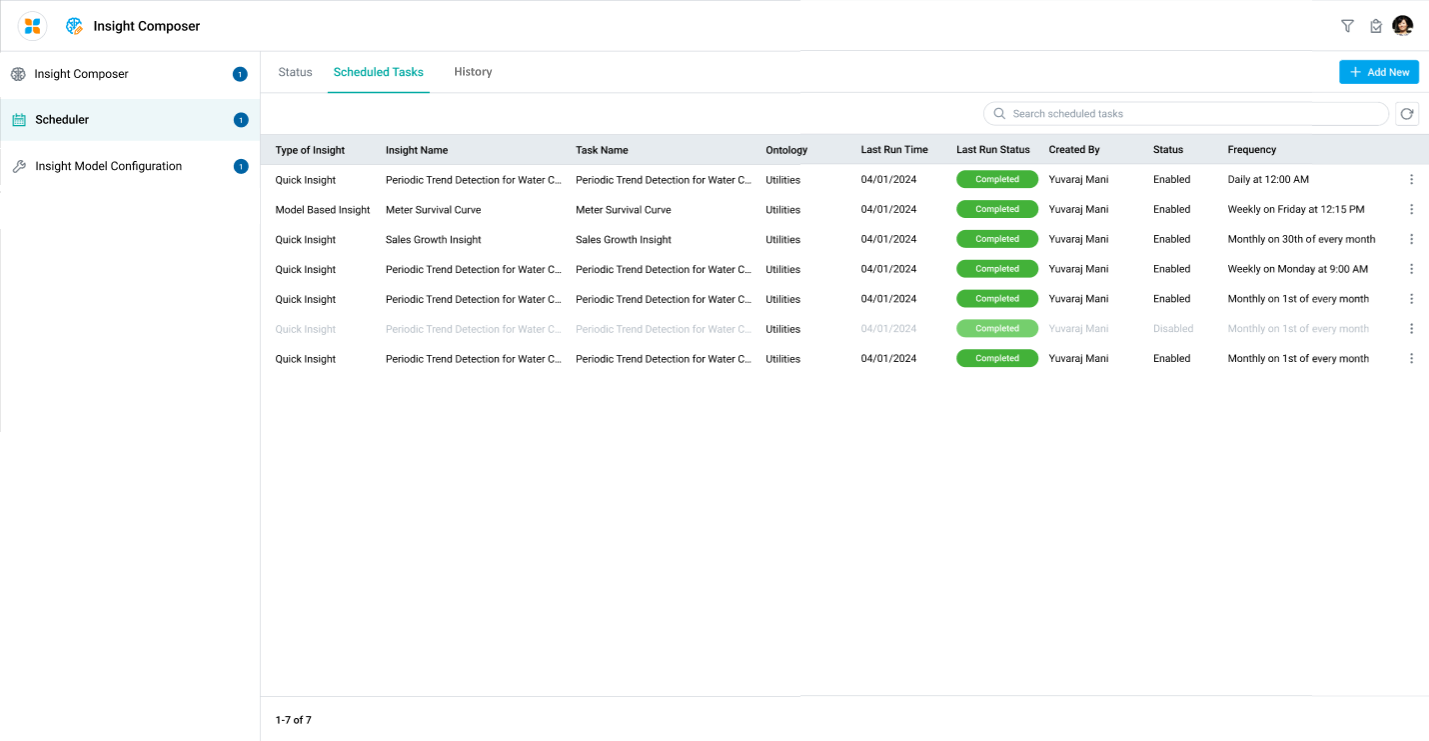
Scheduled Tasks tab
This tab shows a listing of all Insight tasks that have been scheduled.
User Actions
On Page
Add New - click Add New button to create a new object on the current page. See Creating a Scheduled Insight Task.
Search - enter a Search term to find relevant objects on the selected page.
Refresh - click to refresh the page.
In the Options menu for Individual Scheduled Tasks
Run - click to immediately generate the Quick Insight based on the scheduled configuration. See the section below.
Edit - click to edit all property configurations for the scheduled Quick Insight. See Creating a Scheduled Insight Task.
History - opens a dialog to show a History list of previously generated tasks.
Disable/Enable - will disable the scheduled tasks without deleting the configuration. The menu option for Disable will change to Enable once selected. The Scheduled Task entry will be shown grayed out when disabled.
Delete - click to delete a scheduled task configuration. The user will be prompted for confirmation.
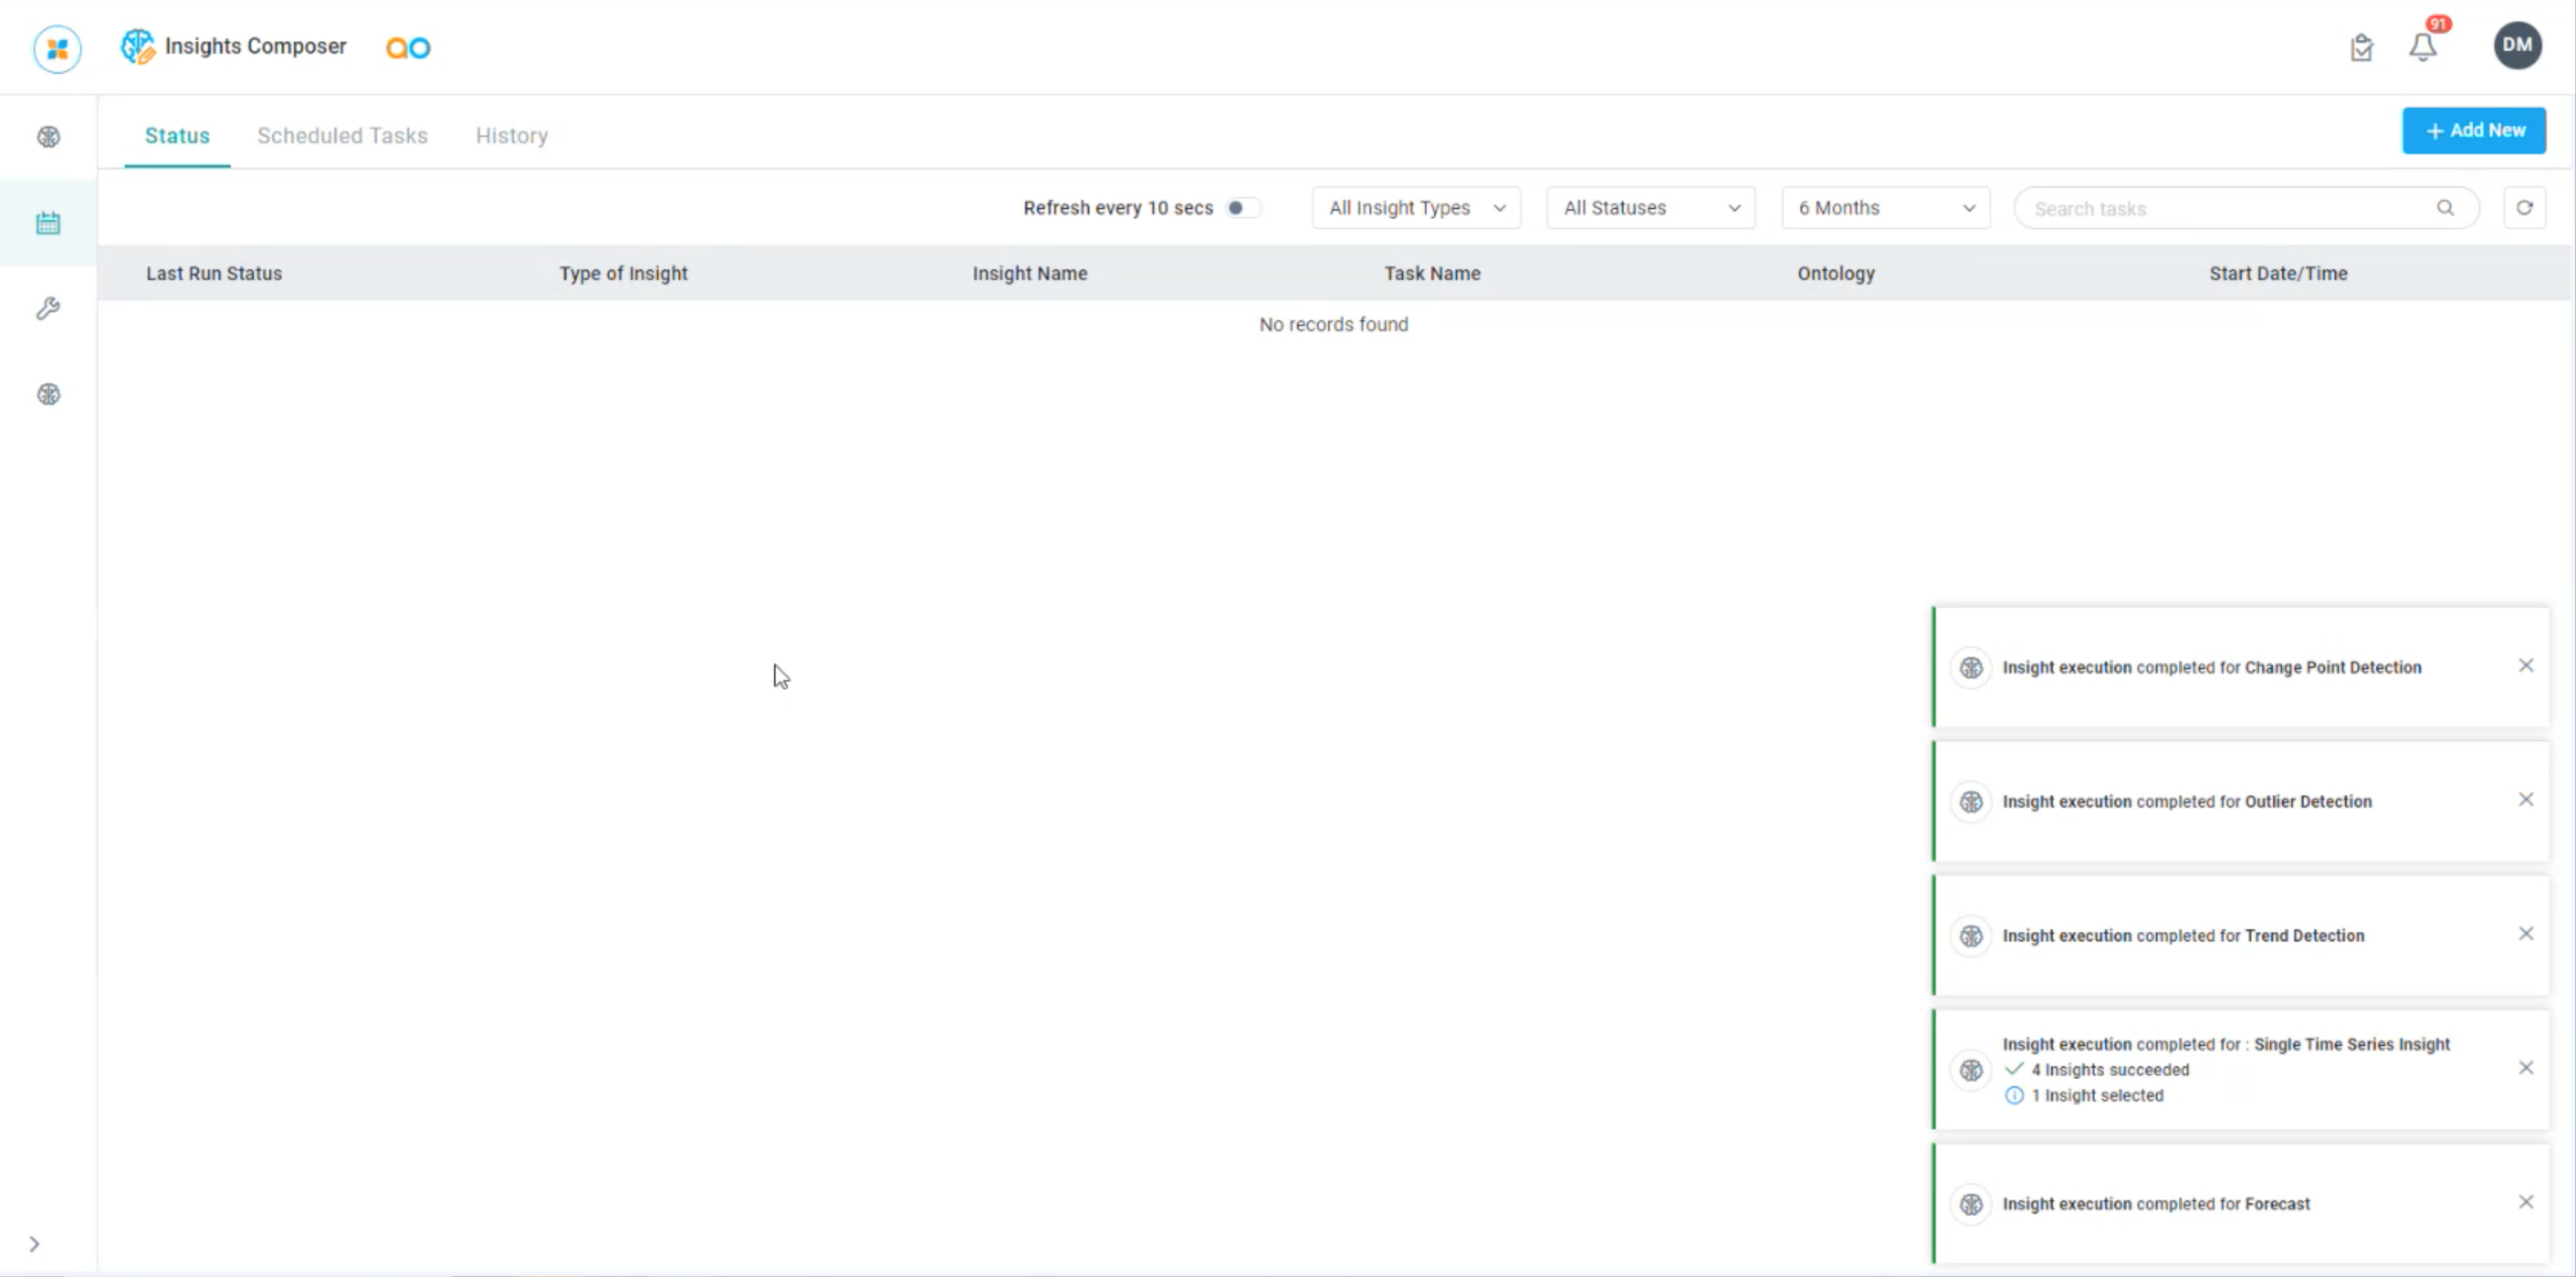
Notifications when Running a task
If the user manually starts the generation of a scheduled task, Notifications will be shown to indicate progress.
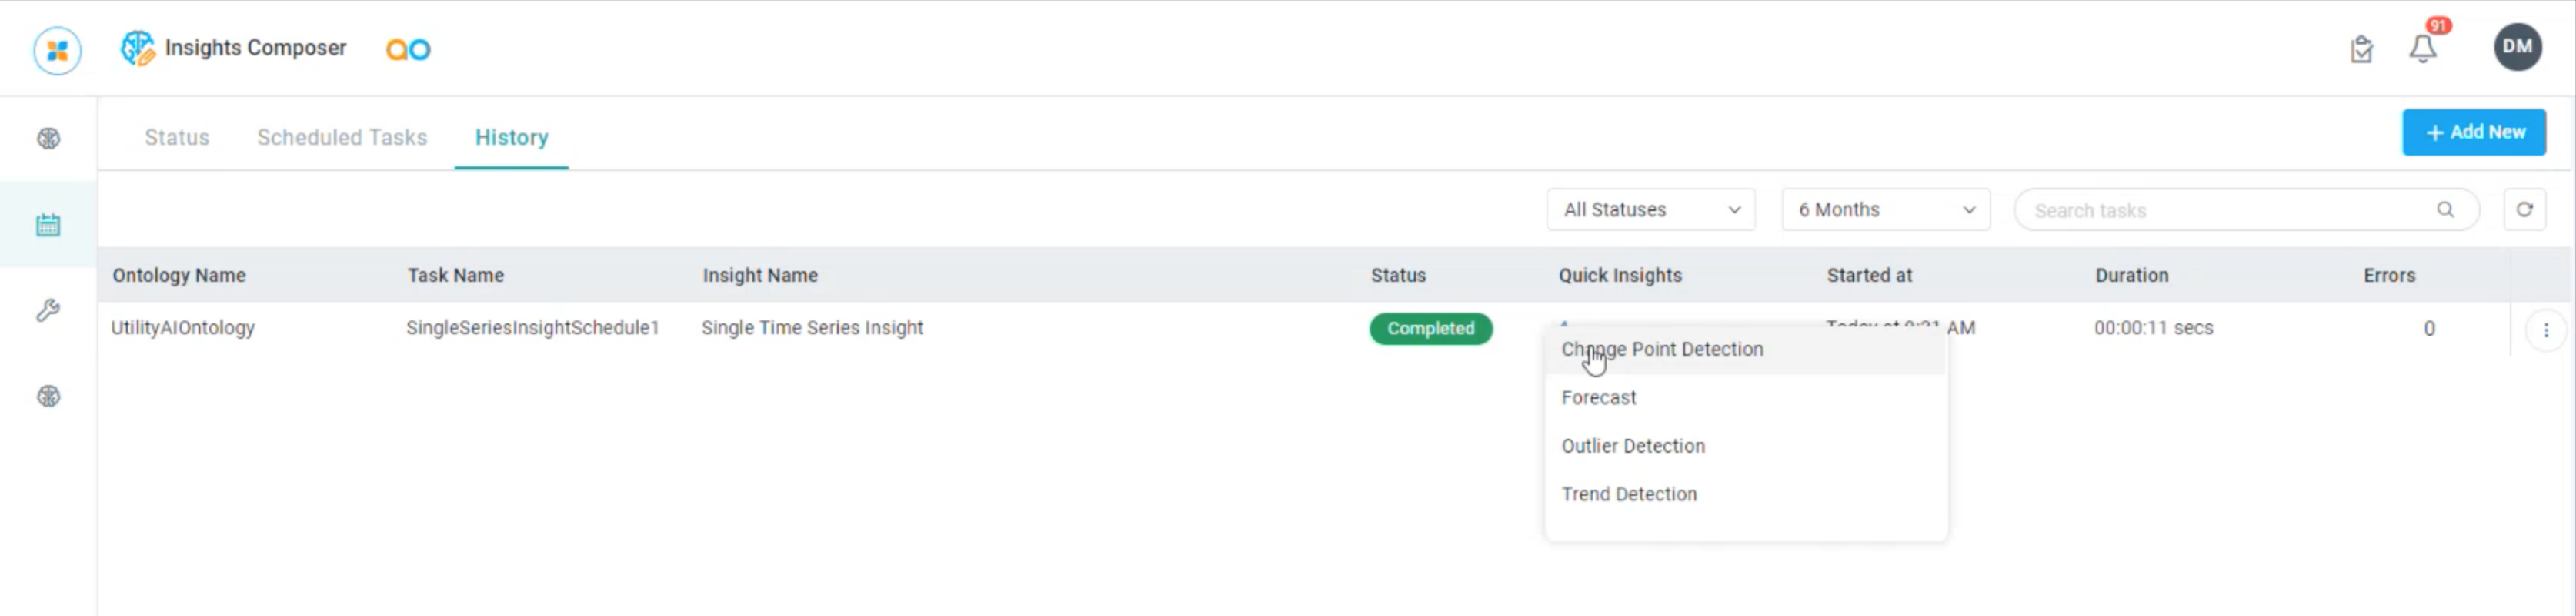
History tab
This tab shows all scheduled Insight tasks that have been executed.
User Actions
On Page
Add New - click Add New button to create a new object on the current page. See Creating a Scheduled Insight Task.
Filters
Status - select to filter by Status (All Statuses, In Progress, Completed, Failed, Suspended, Canceled).
Time Period - select to filter by Time Period (6 Months, 3 Months, Last Month, Current Month, 2 Weeks, Last Week, Current Week).
Search - enter a Search term to find relevant objects on the selected page.
Refresh - click to refresh the page.
In the Options menu for History Entries
View Insight Results - click to open a dialog showing the Preview of all generated Quick Insights for the selected item.