
Intended audience: developers administrators
AO Platform: 5.0
Overview
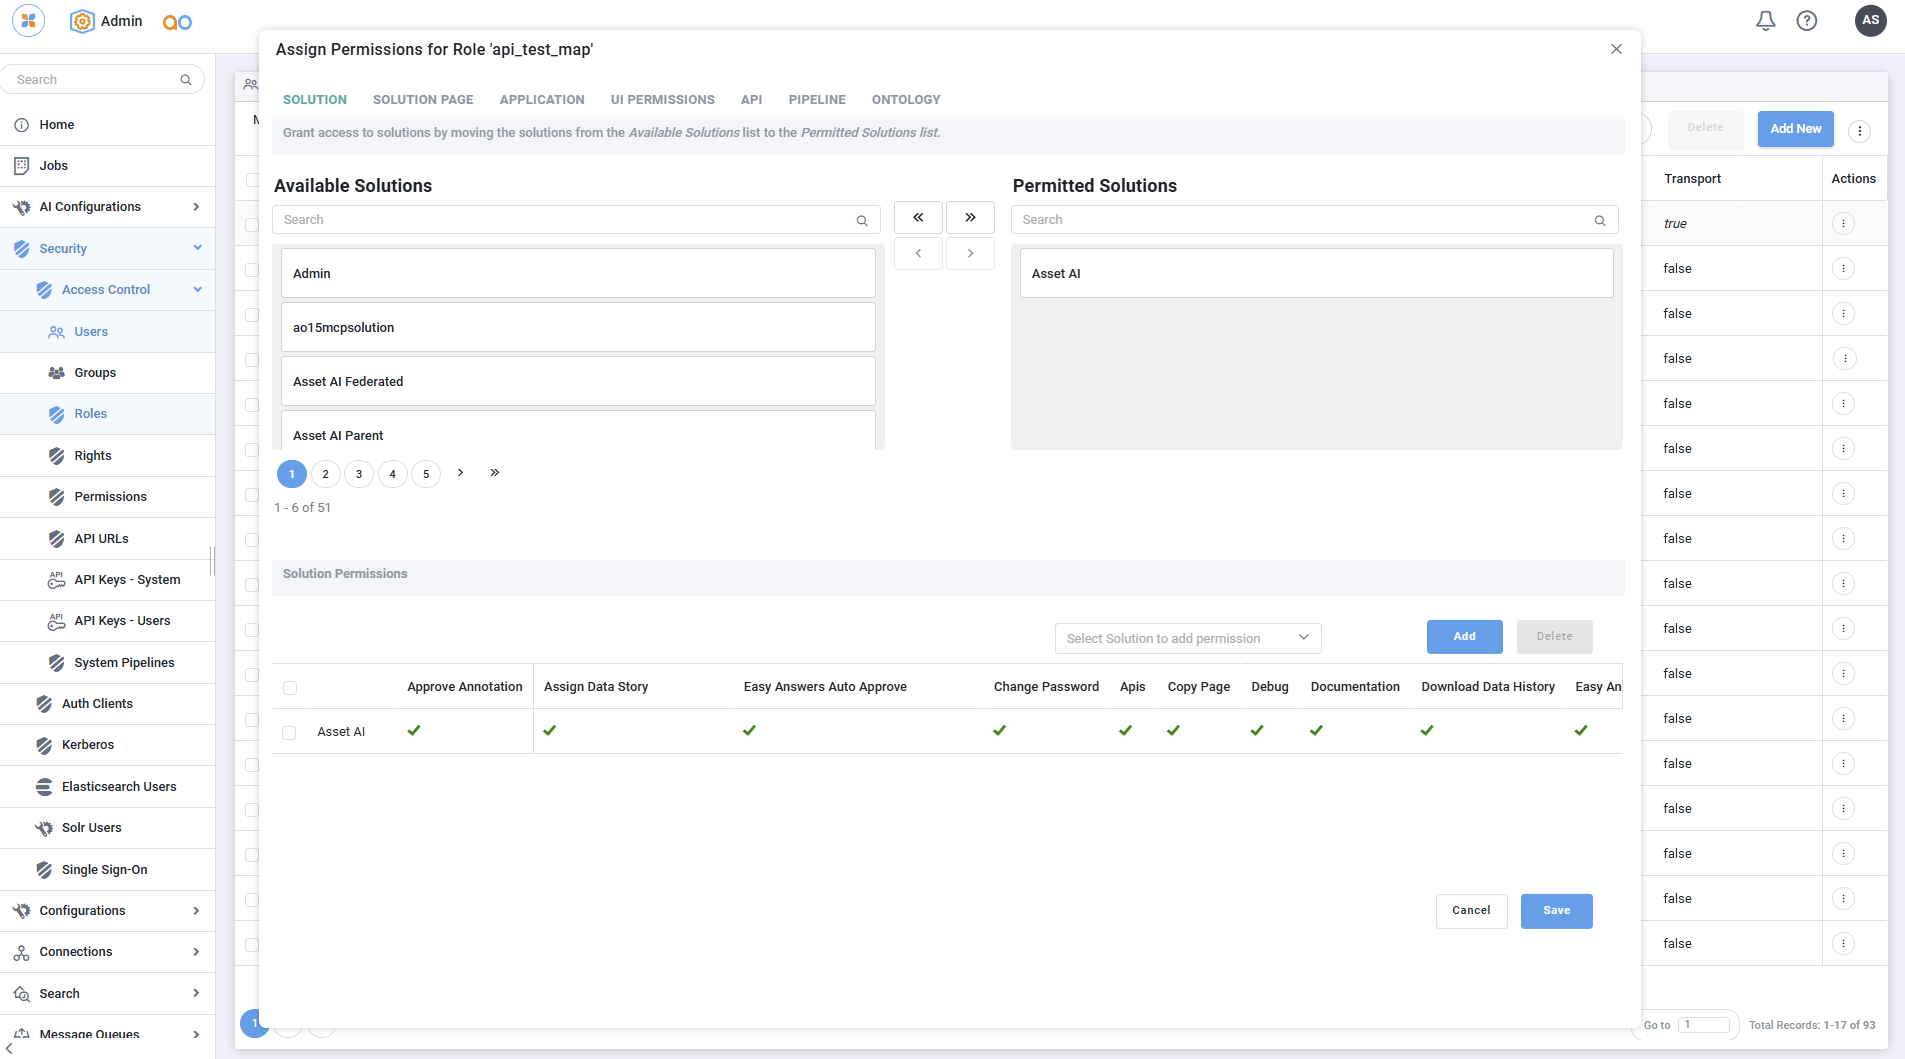
The SOLUTION tab is where you grant a Role access to Solutions and decide what it can do within each one. It is also where permission setup begins, because until a Role has access to at least one Solution, you can't permit any Pages, Applications, or other components for it.
The tab works in two parts. First you grant the Solutions in the top section, and then you set the individual Rights for each granted Solution in the Solution Permissions section below.
Assigning Solution Access
In the top section, the left panel lists the Available Solutions and the right panel lists the Permitted Solutions, which stays empty until you grant access.
-
In Available Solutions, find the Solution using the search box or the page controls, then select it.
-
Move it across to Permitted Solutions with the arrow buttons. The single right arrow (›) moves the Solution you've selected, and the double right arrow (») moves all of them.
-
To take access away, select a Solution under Permitted Solutions and use the left arrows (‹ or «) to move it back.
Set Rights for each Solution
Once a Solution is permitted, the Solution Permissions section at the bottom controls what the Role can do within it.
-
From the Select Solution to add permission dropdown, pick a permitted Solution and select Add to create a row in the table. You can also pick Any Solution, which applies the same Rights to every Solution the Role can access.
-
In the row, turn each Right on or off with its checkbox. The available Rights include Approve Annotation, Assign Data Story, Easy Answers Auto Approve, Change Password, Apis, Copy Page, and Debug, with more to the right that you can reach by scrolling the table horizontally.
-
To remove a Solution's Rights, select its row and choose Delete.
Contact App Orchid | Disclaimer