
Intended audience: developers administrators
AO Platform: 5.0
Overview
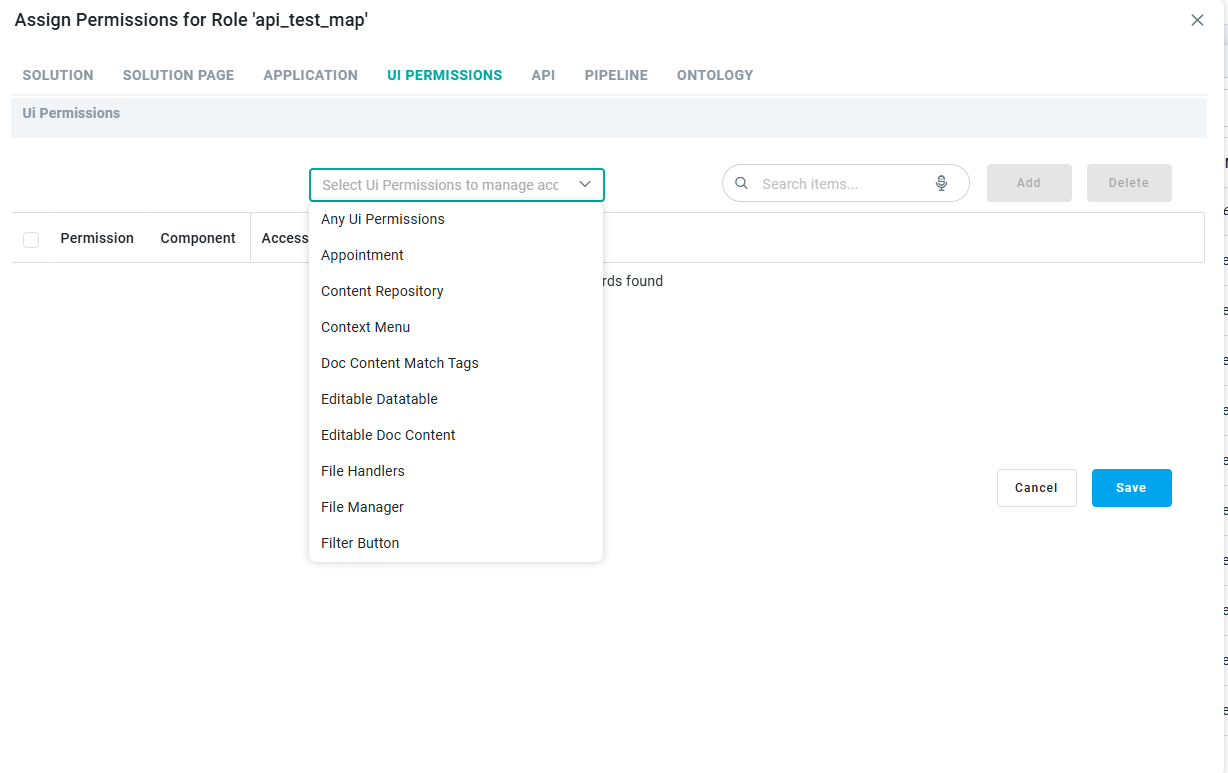
The UI PERMISSIONS tab controls access to individual interface components and the actions within them, such as File Manager, Filter Button, or Context Menu. It works differently from the other tabs, since there is no Available and Permitted transfer. Instead, you pick a component, set which of its actions a Role can use in a short dialog, and then fine-tune those actions in a table.
Assigning UI Permissions
-
From the Select Ui Permissions to manage access dropdown, pick the component you want to configure, for example File Manager, then select Add.
-
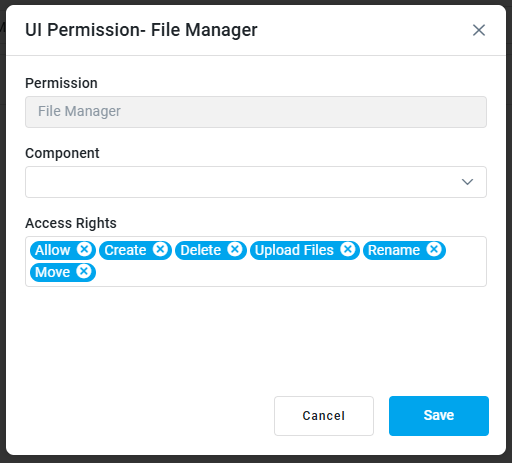
The UI Permission dialog lists every action the component supports under Access Rights, each shown as a chip, for example Create, Delete, Rename, Upload Files, and Move. All actions are included by default. Select the X on any action the Role should not have, then select Save to add the component to the permissions table.
-
The component now appears in the table with its Permission, Component Name, and Access Rights. Each action shows as a checkbox you can turn on or off directly in the row, so you can adjust access without reopening the dialog. In this example, clearing the Move checkbox stops the Role from moving files in File Manager.
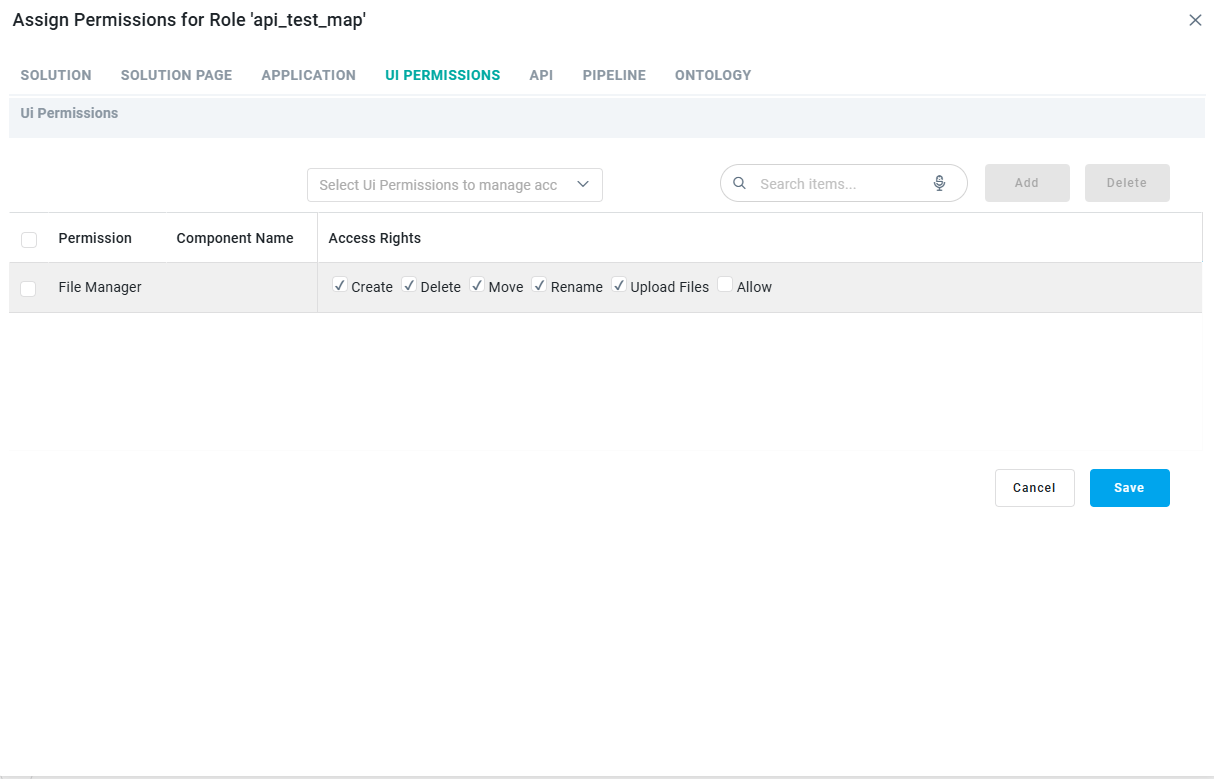
When you have finished, select Save to apply the changes, or Cancel to discard them.
Contact App Orchid | Disclaimer